How to Avoid Bubbles, Wrinkles, and Visible Seams in a Mural
A troubleshooting guide to smooth mural wallpaper installation, including bubbles, wrinkles, panel gaps, seam alignment, and trimming.
Article focus: installation and removal
The installation choice in practice
The right installation method depends on the chosen material and wall condition, so prepare the wall before ordering and follow the material-specific instructions.
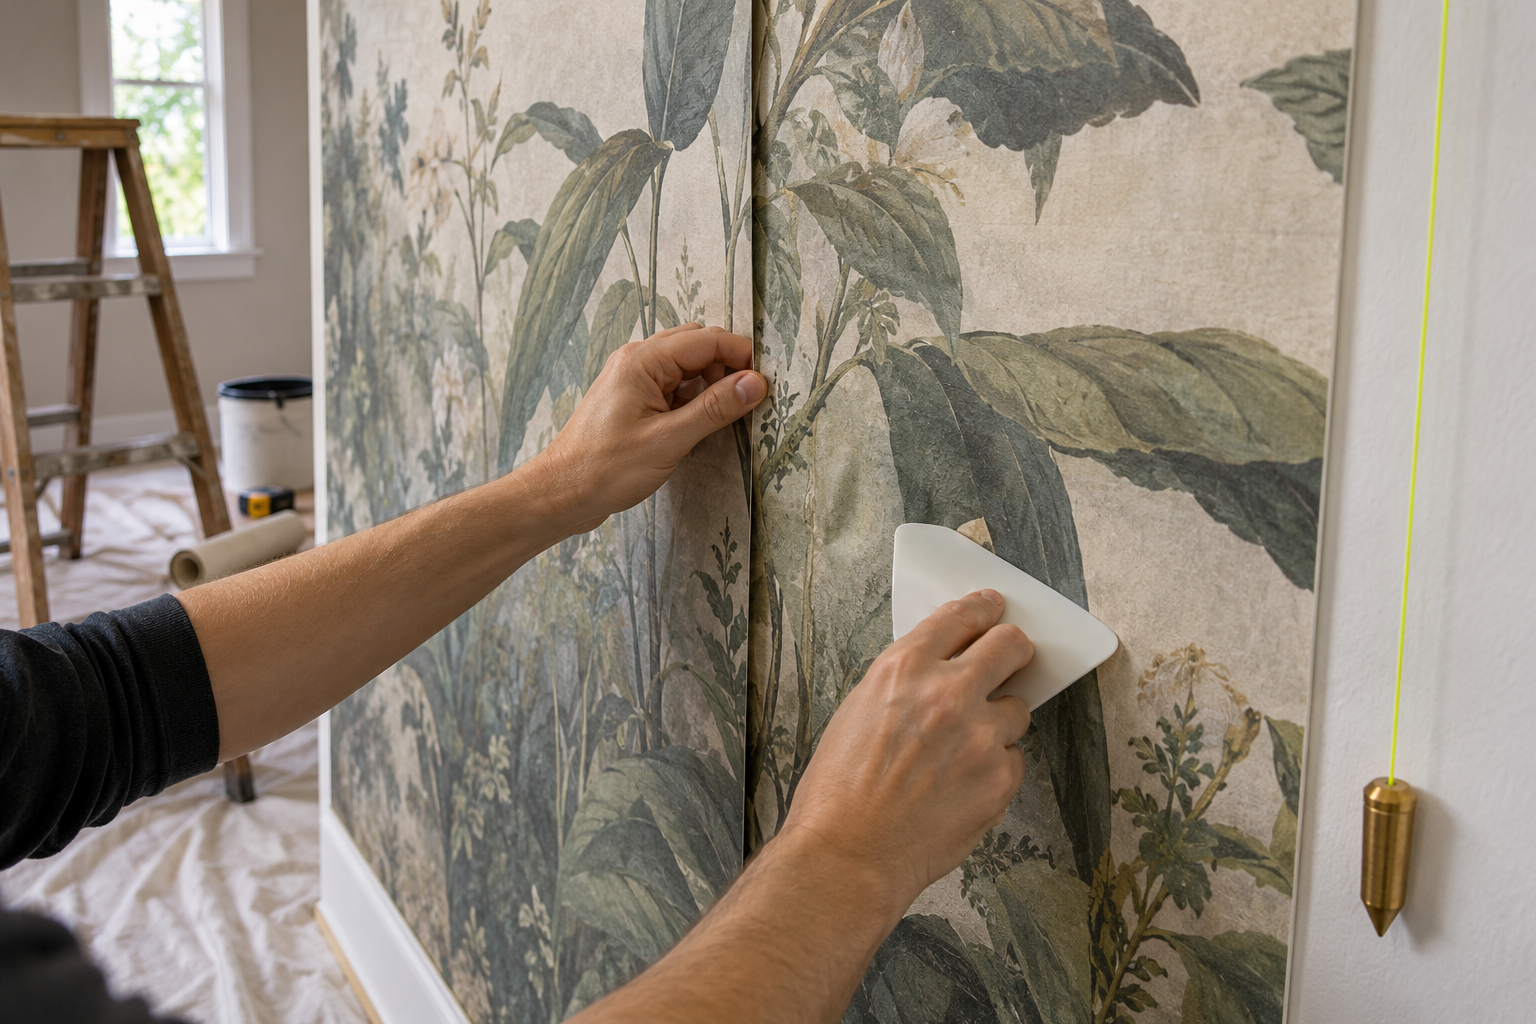
Example application: Any room with a suitable, prepared wall · installation and removal
Bubbles, wrinkles and visible seams have different causes, so prevention starts before the first panel touches the wall. Trapped air may move under gentle smoothing; a hard bump suggests debris or a wall ridge; a fold reflects uneven handling; a broken image line at a seam signals alignment or print trouble. Inspect the numbered panels, prepare a smooth sound wall and establish a plumb starting line. Diagnose each fault while the finish remains workable instead of trying to solve all four by pressing harder.
Before hanging: create a wall that will not fight the print
Run a hand over the wall and shine a light along it. Filler ridges, old adhesive, loose paint and texture can prevent full contact and cast shadows through a flat print. Repair and prime as directed, then wait for the wall to be ready. Do not use extra adhesive to compensate for crumbling or damp substrate. The Wallcoverings Association's preparation guidance calls for a clean, dry and structurally sound wall.
Unroll or lay out all panels on a protected clean surface. Check numbering, print sequence, dimensions, visible damage and colour consistency before cutting. If the image does not align while the panels are flat, stop and ask the supplier. Hanging them will not correct a production or ordering discrepancy. The Wallcoverings Association likewise advises inspecting goods first and pausing when a discrepancy appears.
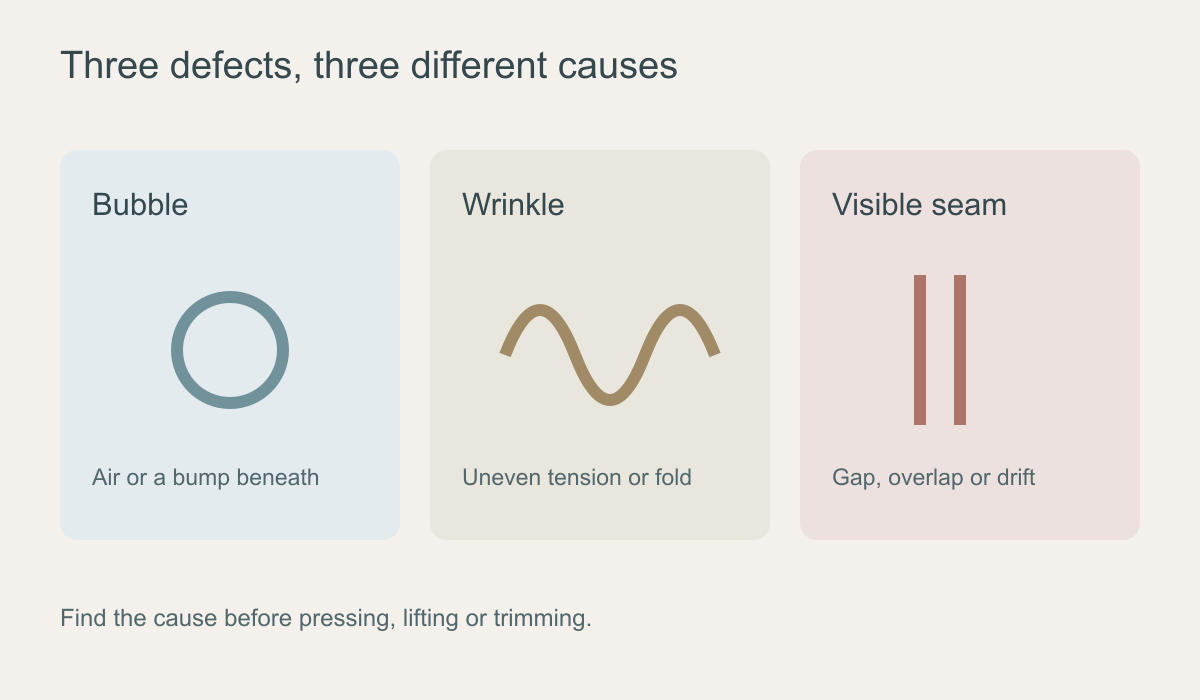 Identify the defect before deciding how to correct it.
Prevent bubbles by controlling contact
A bubble is usually air trapped between the mural and the wall, though a bump underneath can look similar. Present only a manageable section of the panel to the wall at a time. Smooth with the tool and pressure recommended for that material, moving air toward an open edge rather than sealing all edges around it. For a self-adhesive sheet, remove the release liner gradually while a helper controls the loose length. For pasted material, apply adhesive exactly as the maker specifies and respect its working time.
If a small air pocket appears during installation, pause before pressing harder. Check whether it is movable air, a lump of paste or a wall defect. If the material can still be lifted according to its instructions, gently reposition that area and smooth again. Do not puncture a finished print with a needle or scrape it with a sharp edge unless the manufacturer explicitly instructs that method; it may leave a visible mark or compromise the surface.
Prevent wrinkles by avoiding tension
A wrinkle forms when part of a panel is fixed while another portion is pulled, folded or compressed. Do not stretch the sheet to force a tree branch to meet at the seam. The image may appear aligned briefly and shift again as the material relaxes. Support long panels with a second person so the hanging length does not drag. Start with a plumb reference rather than following a corner that may lean.
Correct a developing fold while the material remains workable: stop, release only the permitted section and lay it down again with even support. Strong repeated lifting can damage ink or adhesive, especially on a tacky product. If a crease is sharply set into the print, smoothing harder may polish or tear it rather than remove it. Contact the supplier if the instructions do not cover the situation.
Seams are an alignment problem and a material problem
First establish the intended joining method. Some murals have butt seams; others need a product-specific overlap and trimming. An overlap used on a butt-join print creates a ridge and duplicates part of the artwork. A gap exposes the wall colour. If a dark mural has pale edges, even a narrow gap may look conspicuous. Follow the panel guide and do not invent a double-cut process.
Check the picture across each seam near the top, middle and bottom before smoothing the whole panel. A leaf that aligns at the ceiling but diverges near the floor suggests drift, stretch or an uneven start. Check the first panel's vertical line again rather than moving each later panel progressively to chase the artwork. It is easier to correct a new panel than a whole wall of accumulated error.
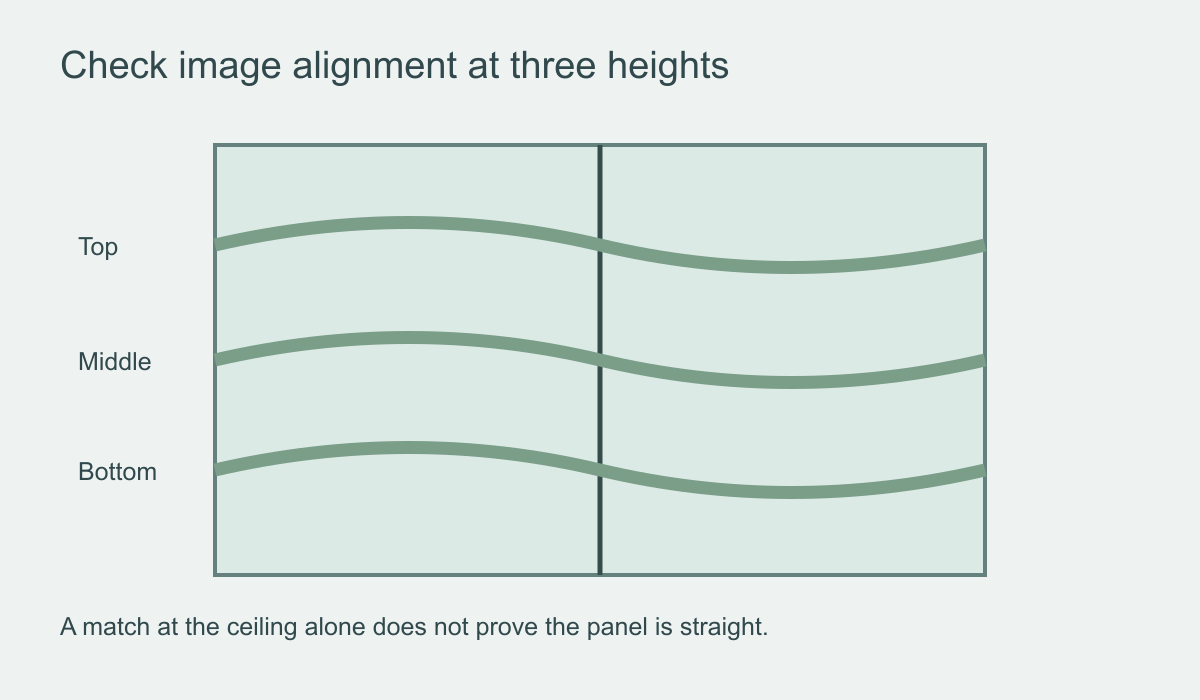 Match at several heights so small errors do not grow across the scene.
Look for colour before blaming geometry
Two panels may meet physically yet still show a vertical band because of lighting, wall colour showing through a gap, print variation or a damaged edge. Examine them under consistent room light. If the mismatch was visible while the panels lay flat, document it before installation. If it appears only on the wall, inspect whether an edge has been stretched, overlapped or pressed differently. Do not continue across the wall while a colour difference remains unexplained.
Material-specific timing matters
Peel-and-stick, paste-the-wall and other finishes offer different opportunities to adjust position. A tacky sheet may grab quickly; a pasted sheet may have a stated open time. The Wallcoverings Association distinguishes self-adhesive from unpasted materials, but the exact application and working time still come from the maker's instructions. Do not transfer a correction technique from a video using another product.
Do not force a panel to stay attached to a contaminated or damp wall by adding more pressure. Repeated bubbles in the same region can indicate substrate or adhesive incompatibility rather than poor smoothing. Stop, assess the wall and contact the supplier or installer before risking the remaining panels.
Trim only after the scene is aligned
Leave the specified installation allowance at the boundaries and use a sharp blade with a straightedge when the instructions say to trim. A dull blade can drag or tear the printed edge. At corners and around openings, avoid cutting away important parts of the image before you know where the next panel sits. Protect outlets and turn power off before handling fittings.
Do not promise yourself that a clearly crooked seam will disappear after drying. Some temporary moisture-related marks may change, but alignment errors need correction while the product is still workable. If the surface begins to tear or the wall paint lifts, stop. The best repair is often an early, documented conversation with the supplier, not an improvised technique applied to every panel.
If a defect appears after the wall has dried
Do not assume every raised area is an air bubble. Pressing a hard lump may damage the print without removing the filler ridge or debris beneath it. A new patch of lifting at a seam can point to dampness or poor adhesion; a permanent fold or misregistered image is unlikely to flatten into alignment. Photograph the whole wall and a close detail in even light, note when the defect appeared, and compare it with the spare panel or installation guide. Ask the supplier or installer which repair, if any, is suitable for that exact finish before lifting, injecting adhesive or cutting the surface.