Can Mural Wallpaper Be Used on a Ceiling?
Consider access, gravity, viewing angle, lighting, surface condition and safe installation planning for a ceiling application.
Article focus: pricing and measurement
Budgeting this wall with confidence
Start with accurate wall measurements; the final custom mural price depends on area, material and any finishing options.
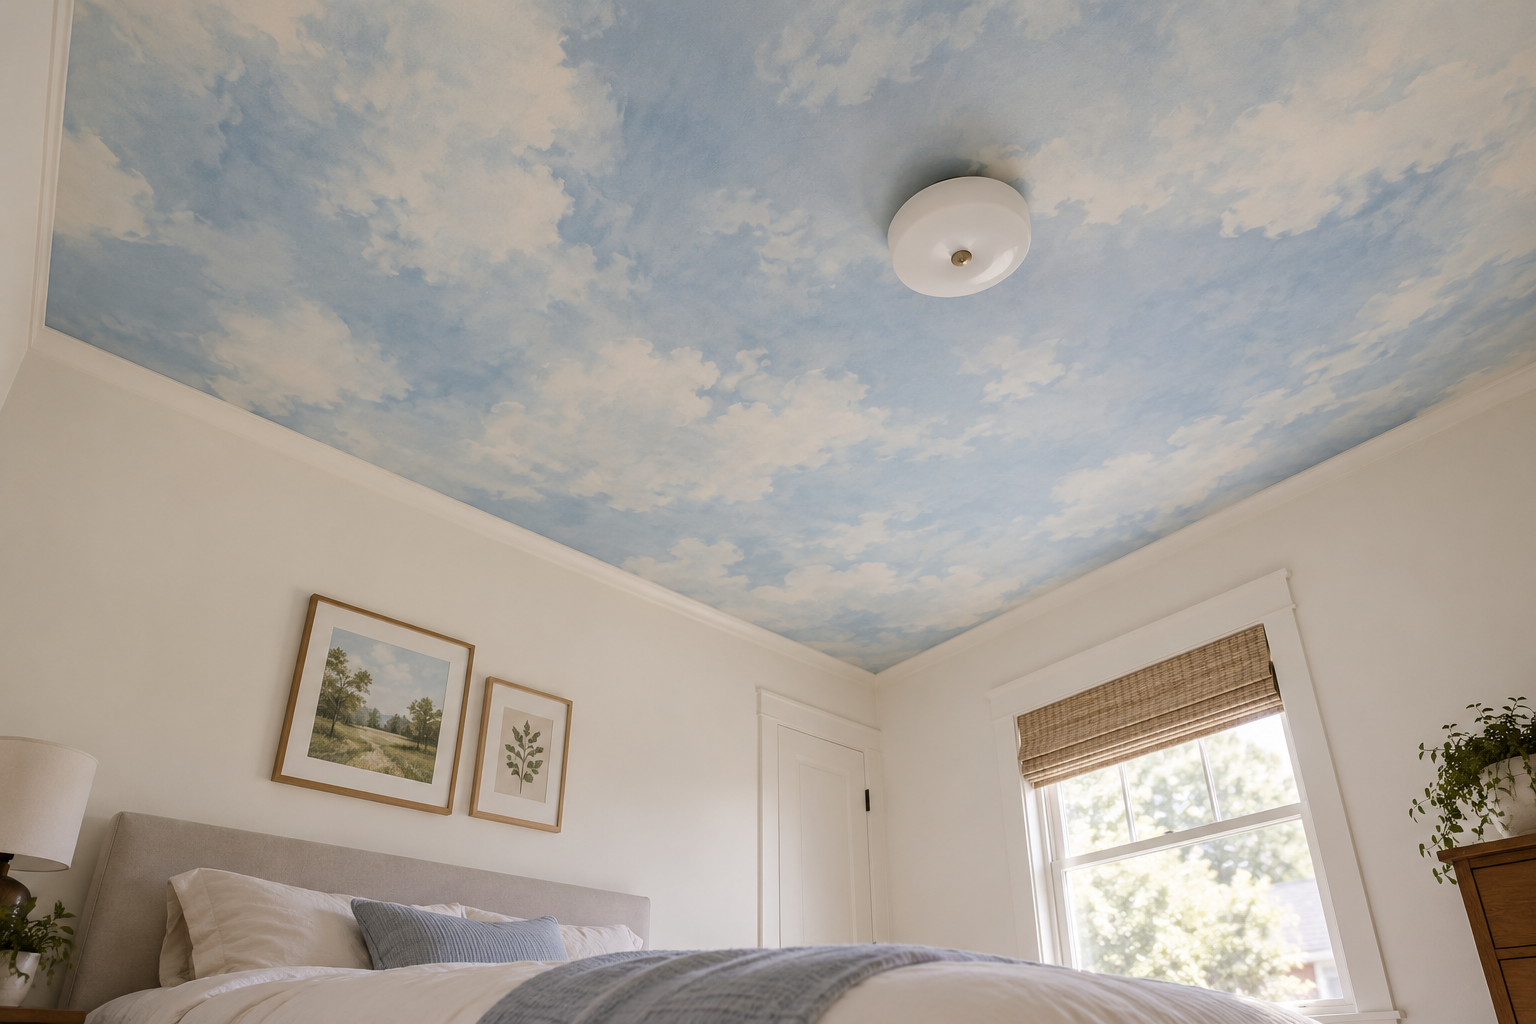
Example application: Bedroom · pricing and measurement
A mural on the ceiling can change how a room feels more dramatically than a mural behind a sofa, because you see it from every part of the floor. The illustrative bedroom view above shows a pale sky print overhead while the walls stay plain, making the ceiling-wall boundary and the light fitting part of the composition. It is a visual concept, not evidence that any Solowalls material is approved for this use. Material, adhesive, substrate, access, lights and local requirements all need checking before a wall mural is repurposed above your head.
Start with the ceiling, not the picture
Check whether the ceiling is plasterboard, plaster, painted concrete or another material. Look for cracks, loose paint, staining, condensation and previous repairs. A textured or stippled finish can interfere with full contact, and an old painted surface may fail under the weight and tension of a wallcovering. Resolve leaks and moisture sources first. The Wallcoverings Association's surface-preparation advice centres on a clean, dry, sound background; overhead use adds a practical reason to verify that the chosen system is appropriate rather than merely hoping it will stick.
For new plasterboard, finish joints and select a compatible primer after checking the board, mural and adhesive makers' instructions. British Gypsum notes that its drywall primer is intended to even out board and joint absorption on wall and ceiling backgrounds. That does not establish compatibility with every wallcovering or prove a particular mural is approved for overhead installation. Obtain written product-specific guidance where the manufacturer has not addressed ceiling use.
Confirm the exact material and application method
Some companies sell ceiling-specific mural products; Photowall lists a ceiling mural with its own material and installation information. That is evidence that ceiling murals exist, not an approval for any Solowalls finish. A paste-applied non-woven sheet, a vinyl-faced mural and a self-adhesive product may require different preparation and support while hanging. Ask whether the selected material, adhesive and primer together are recommended for overhead use, including its size and the room's conditions.
Ask the supplier a yes-or-no question about the precise combination: this printed backing, this adhesive or self-adhesive system, the existing ceiling coating and the proposed panel dimensions. Request the preparation and installation instructions that expressly apply overhead. A design name alone cannot answer whether one of its available materials is suitable, and an approved adhesive for a wall may not answer the ceiling question. If the supplier cannot confirm the proposed system, change the specification or use the artwork on a wall rather than relying on a styled ceiling photograph.
Design the picture for an upward view
Wall artwork often has a clear ground, horizon and vertical trees. On a ceiling, that perspective may look strange from the bed or doorway. Clouds, abstract washes, scattered stars and distributed foliage can be easier to read from several directions, but even they need a deliberate crop. Stand where people will normally look up. Consider whether the picture should have a recognisable “top” and, if so, which side of the room should face it. A scene that looks balanced when viewed from the door may appear upside down from the bed.
Try a low-tech orientation test before approving print. Sketch the ceiling as a rectangle with its door, bed or seating, then place a small arrow on the artwork for its intended top. Rotate the sketch while standing at the main viewing positions. If the design includes branches, architecture or lettering, the right orientation may be obvious from one position but uncomfortable from another. A non-directional wash may avoid that tension; it is not automatically the better design, but it asks less of the viewer's position.
Lighting alters the reading too. A pendant can hide a focal point, while grazing light near cornices may make seams or slight changes in surface level more apparent. Compare the artwork under daylight and the room's evening lights. Pale skies can visually recede, whereas a dark canopy may make a high ceiling feel more enclosed; these are design effects to preview, not promises that wallpaper changes the physical room height.
The flat blue sky artwork below illustrates a motif with no single upright figure. It is shown as source art only; the fact that it is a flat mural image does not mean the associated wallpaper has been approved for ceiling use. Its pale cloud areas might allow a light fixture to interrupt the design without cutting a face or building, but the actual crop and material need their own review.

Map fixtures and panel routes on a plan
Measure ceiling length and width at several points. Mark the centre and size of pendants, downlights, smoke alarms, vents, access hatches, beams and cornices. The mural may need to be divided or trimmed around them. A pendant placed through the only bird or bright sun changes the picture; moving the crop before print is usually better than improvising on a ladder. Confirm which fittings can be safely removed and replaced by a qualified person. Do not cover detectors, vents or access panels with wallpaper.
The plan below is a layout aid. It shows panels running across a rectangular ceiling with a light and a vent kept visible. The installer should decide the actual starting edge, panel direction and trim allowance for the supplied material. Ceiling dimensions are not always perfectly square, and the first run should not be aligned to a crooked wall by eye alone.
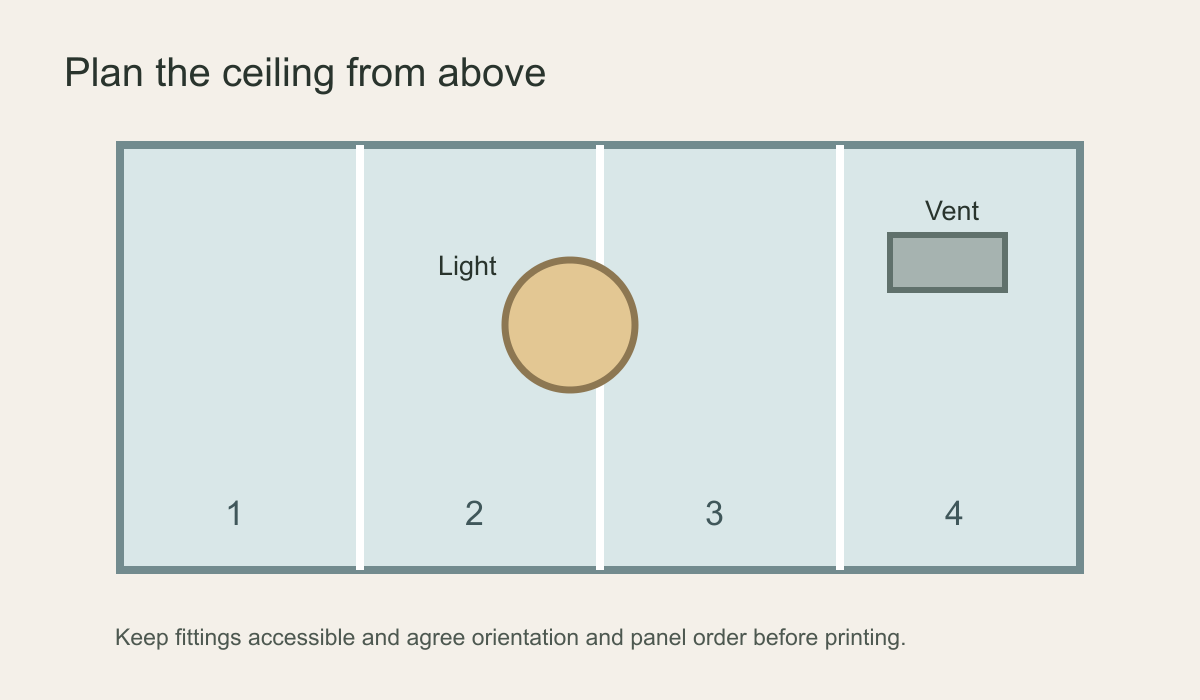
The drawing is also a reminder to distinguish a fixture's visible trim from the opening or box behind it. The installer and electrician need to agree where the material stops and how the fixture remains accessible. Around a cornice or ceiling rose, decide whether the mural ends in a crisp inset field or is trimmed to the profile. This affects measurements and the printed crop. Do not hide a service hatch merely because it interrupts the artwork; plan a deliberate edge around it instead.
Choose panel direction with the room in mind
Panels can run across the short or long dimension, depending on the supplied width, artwork and installer's method. Either choice changes the number and position of seams. Lay the proposed joins over the artwork before printing: a join through an open sky may be less conspicuous than one crossing a small, high-contrast object. Then consider the room's light. Seams seen under low-angle daylight from a window can behave differently from seams seen under a central pendant. The best arrangement balances workable installation, the approved material and the visual composition.
Do not assume the ceiling is a true rectangle. Measure each side and the diagonals where practical, and note beams or recesses. The installer can then decide how much allowance is required for trimming and whether the artwork can be centred without creating a narrow, awkward strip at one edge. Check the selected crop at the final dimensions, and request a panel layout from the supplier if the available preview does not show how the design meets the fixtures.
Why overhead installation is different
On a wall, gravity may help a hanging sheet fall into place. On a ceiling, the installer has to support the length while aligning and smoothing it, often from access equipment. Paste may contact the face or drip; self-adhesive backing may fold back onto itself. Working above shoulder height is tiring, and a misaligned first run can affect the whole image. Stable access, at least two capable people and a clear floor area are sensible minimum considerations. For a large ceiling or complex lighting layout, a professional wallcovering installer is often the safer choice.
Access should cover the entire working area without repeated reaching beyond a stable platform. Move furniture and protect floors before panels are opened. Agree who supports each sheet, who checks the numbering and who watches the alignment, because trying to do all three while holding material overhead invites mistakes. Do not improvise a different paste, extra spray adhesive or heat treatment to compensate for a product that has not been specified for ceilings. If a panel will not remain supported as instructed, stop and consult the supplier.
Do not work around live electrical fittings. Isolate circuits and use a qualified electrician where fittings must be disconnected or moved. In commercial or regulated spaces, ask the responsible professional about applicable fire and interior-finish requirements for the exact installed system. A marketing image of a ceiling mural is not evidence of compliance. Obtain any required material data and project approval before installation.
Inspect before and after installation
Lay out the numbered panels on a clean floor and inspect their colour, orientation and completeness before anything is pasted or backing is removed. Check that the approved crop matches the ordered ceiling and that the installer understands which way the design faces. If a printed defect or mismatch appears, stop and contact the supplier. After installation, inspect the joins and edges under the actual room lighting, including the lights that illuminate the ceiling at night. Record the product, primer, adhesive, crop and panel plan for future repair or removal.
Plan future access as carefully as the first installation. Light fittings may need servicing, and a concealed leak or staining may require opening a small area. Keep the source artwork and a copy of the approved crop as well as the panel plan; a replacement printed without the same scale or orientation can look wrong even when its colours are close. Where matching is critical, ask the supplier what replacement options exist before committing to a whole-ceiling design.
Before booking the installer, put the approved ceiling crop and panel orientation on one drawing with the light position, access route and main viewing positions. Agree who will confirm the ceiling surface, who will handle any electrical work and who will support each panel overhead. Keep the fixture's future service access in that discussion: a beautiful cloud placed directly under a light does not help if the fitting cannot later be reached without damaging the print. If any of those responsibilities or the product's overhead approval is unresolved, the drawing remains a proposal, not an installation instruction.