How to Plan Lighting Around Mural Wallpaper
Consider daylight, wall washing, glare, shadow and the viewing direction when planning lighting near the mural.
Article focus: pricing and measurement
Budgeting this wall with confidence
Start with accurate wall measurements; the final custom mural price depends on area, material and any finishing options.
Example application: Living room · pricing and measurement
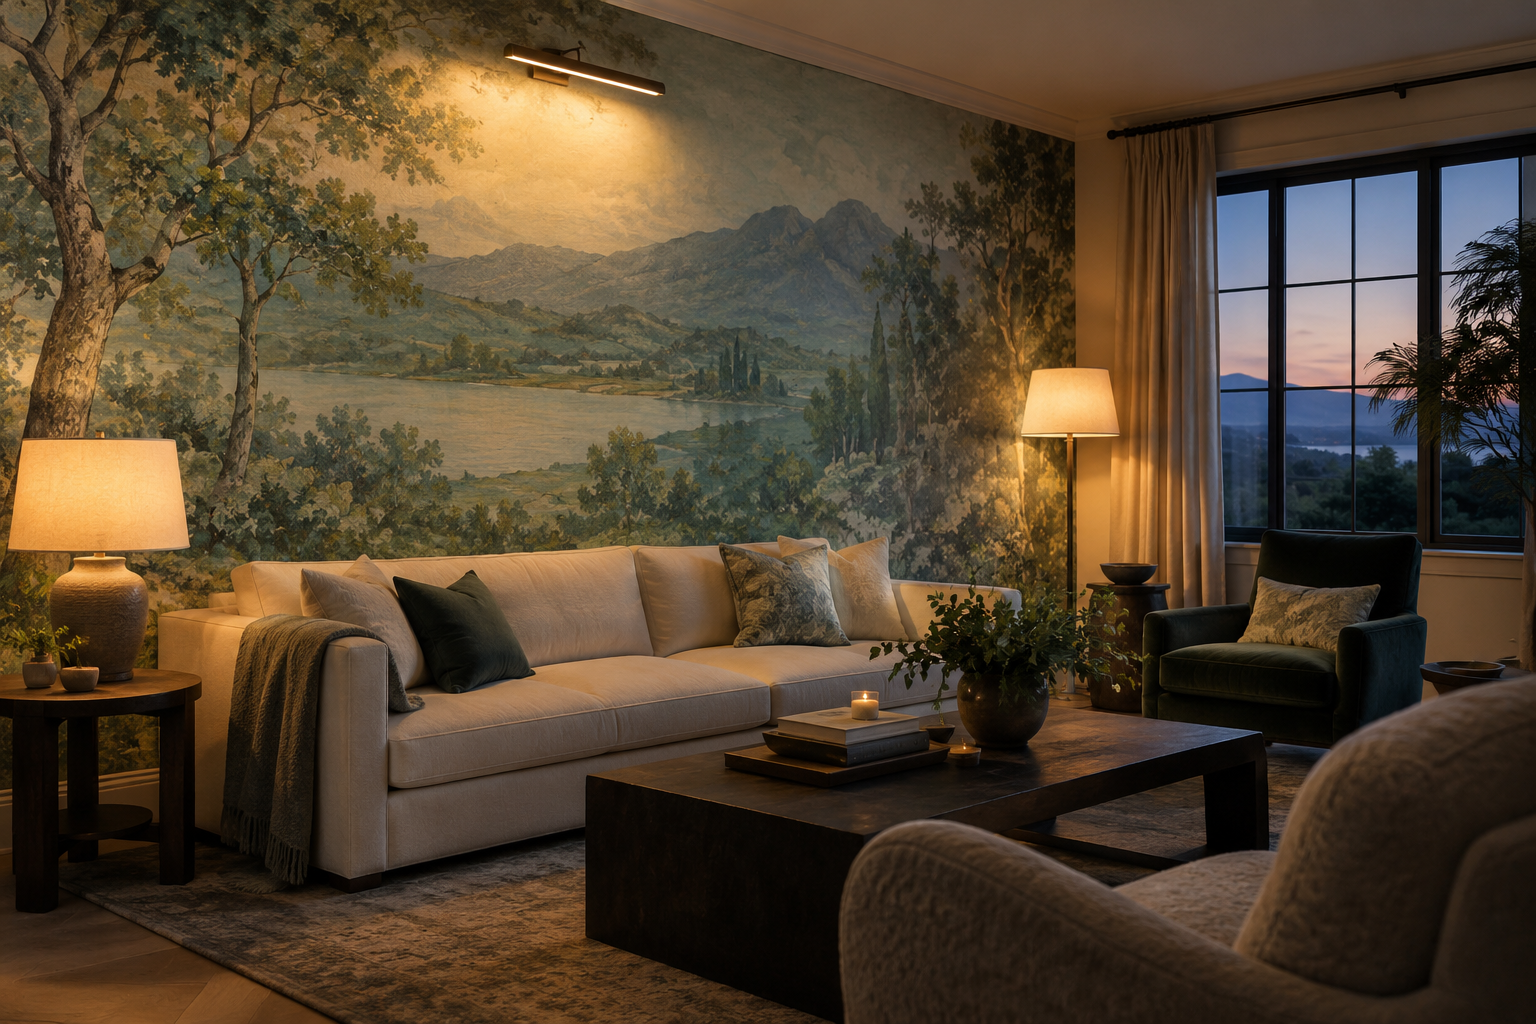
Light a room for the people who use it before adding a lamp solely for the mural. A picture light can give a landscape a dramatic treetop glow, as it does in the room shown here, but it will not necessarily illuminate a whole wall evenly. Begin with the activities, viewpoints and existing light sources. Then decide whether the artwork needs a gentle wash, a deliberate accent or nothing additional at all.
Make a lighting map before choosing a fitting
Visit the room at the time it is normally occupied. Turn on the lamps and ceiling lights you actually use, then stand in the doorway and sit in the principal chairs. Is the mural difficult to see, or is the reading chair simply too dim? Does a window make one end of the wall much brighter than the other? These are different problems. An extra spotlight on the print will not solve poor task lighting at the sofa.
Sketch the mural wall as a rectangle and mark windows, current fittings, the top of large furniture and the main viewing positions. A tall bookcase may cut a proposed beam; a pendant may hang across the printed focal point from the dining seat. The map does not need technical measurements yet. Its purpose is to show where a person will see light, shadow or glare before any new fixture is purchased.
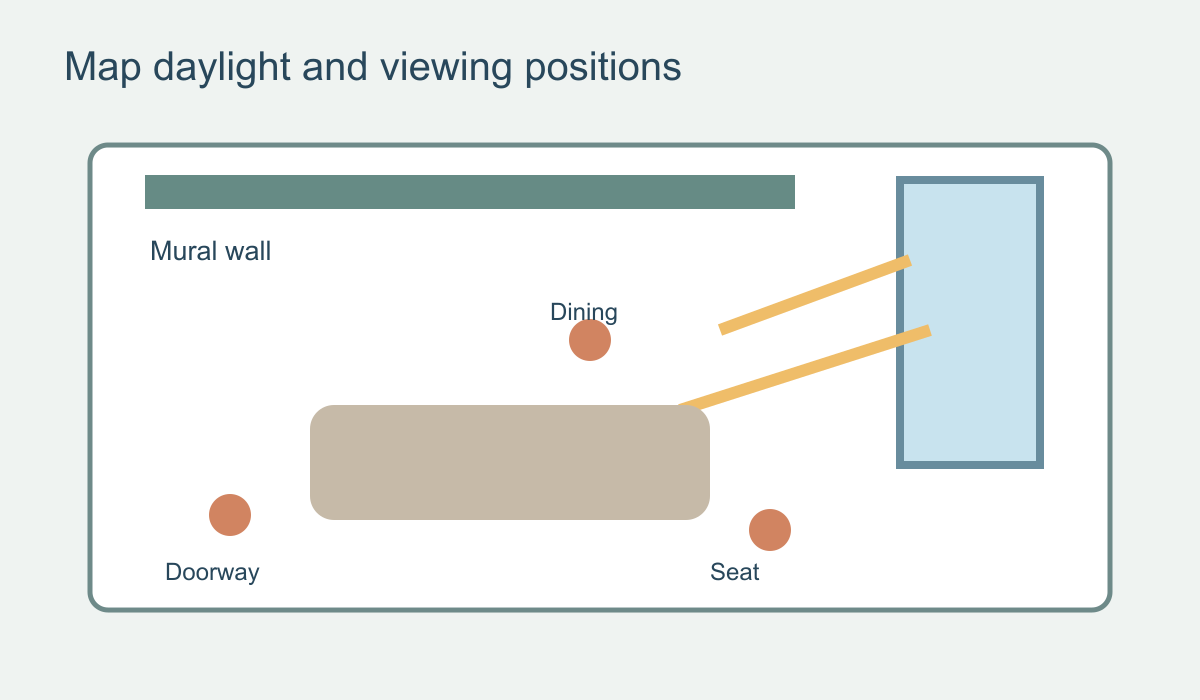 Map the window and the occupied viewpoints, not just the empty wall.
If the existing arrangement already lets people use the room comfortably and the mural reads clearly, stop there. A large print need not have dedicated display lighting. If a dark corner remains, first try moving a portable lamp or adjusting a shade. This reversible test tells you more about the effect than a photograph of an unlit fitting online.
Give ambient, task and accent light separate jobs
Ambient light makes the room navigable and pleasant. Task light lets someone read, prepare food or work at a desk. Accent light changes what the eye notices. A mural light belongs to that third group, so it should be considered after the first two jobs are covered. Otherwise the artwork can be bright while the chair, table or walkway remains uncomfortably dim.
In the feature room, two shaded lamps give the seating area a warm, usable glow, while the fitting above the wall creates a brighter pool among the trees. The lower landscape is intentionally darker. That is a mood, not uniform illumination. If you want the lake and mountains to read with equal clarity after dusk, you would test a broader distribution rather than copying the picture-light position simply because it looks attractive.
A narrow beam can produce a hot spot, making a pale part of the print appear washed out while adjacent details recede. A broad, modest wash may preserve the composition better. Equally, some murals are designed to have shadow and depth; uniform brightness is not always the goal. Decide what you want to see when you enter the room, then choose the light pattern to support it.
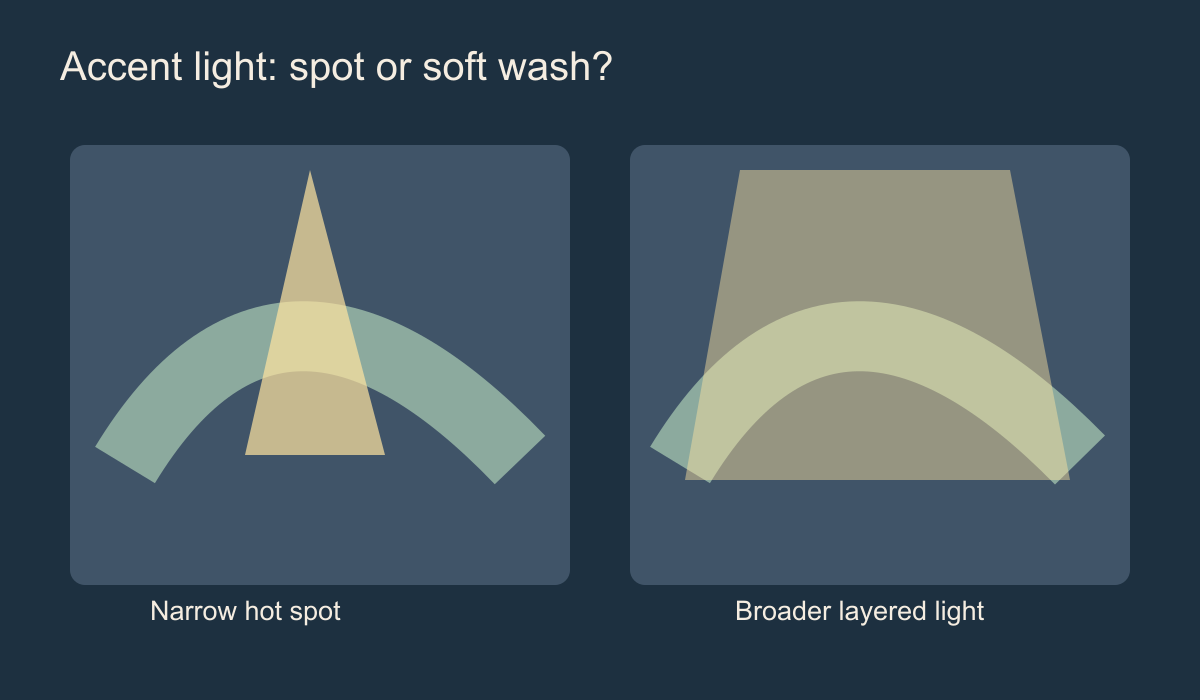 A concentrated spot and a broad wash create quite different readings of the same wall.
Match the beam to the mural's width and composition
A full-wall mural is not a framed picture. A short picture light may brighten the upper centre and leave the sides in shade. This can work if the print has a central subject and you want a theatrical effect. It is less useful when important details continue across the entire wall. Compare the proposed beam spread with the mural's actual installed width and the mounting location, not only with the fitting's style.
One source at the centre of a wide wall may create a luminous patch. Several sources can distribute light more evenly, but their beams need to meet without making a row of obvious circles. Ceiling height, distance from the wall, beam angle and the room's other lights all affect the result. There is no reliable universal spacing for every living room. For fixed fittings, have a qualified lighting professional plan the layout against the real dimensions.
Notice where the image's light and dark areas sit. A mural with a pale sky above deep foliage will respond differently from a nearly monochrome abstract design. If the upper left is naturally bright in the artwork, placing another strong beam there can unbalance the scene. A movable floor lamp can help you explore whether a gentler side light is preferable before committing to wiring.
Include the furniture in this test. A sofa may block low light aimed up the wall, and a floor lamp may throw the silhouette of its shade across a painted horizon. If the mural is made to measure, review the crop with the permanent fittings and furniture in place. Moving a printed focal point slightly may be easier than relocating an existing ceiling connection.
Check glare from the seats, not the switch
A light source can look unobtrusive when you stand next to it yet be distracting from the sofa. Sit at eye level with the lamps on at their intended evening settings. Look across the whole printed surface. A bright reflection, bare bulb or pool of light across a face or mountain peak may draw attention away from the picture. Check the dining seat too if it faces the wall at a different angle.
If the mural is near a television, consider both surfaces in the same view. A lamp aimed towards the wall may create unwanted contrast around the screen even if the mural itself looks vivid. Reducing the accent level, changing its angle or using the room's broader ambient light may make the seating area more comfortable. With a dimmable fitting, try a range of settings rather than approving it only at full output.
Daylight is part of the plan. Curtains or blinds can change which half of the mural catches light and how much electric light is needed at dusk. For the separate question of how existing light changes perceived printed colour, see our guide to lighting and mural colour. Here the priority is placement and purpose: where the lamps go, what they illuminate and whether people can use the room comfortably.
Compare the actual print under candidate lamps
Bulbs described as warm or cool can make the same printed greens, creams and blues look different. However, a colour-temperature label does not describe every aspect of how a lamp renders a surface. The US Department of Energy's LED overview distinguishes the apparent colour of a light source from its effect on the colour appearance of objects. Where possible, hold a mural sample on the intended wall and compare it under the lamps you would use together in the finished room.
Look at both the darkest and palest printed areas. A sample of only one corner cannot show what a large scene does under an accent beam, so also study a full-wall proof or mock-up to understand where those areas fall. Remember that a screen image is not a substitute for a physical print sample. If sunlight reaches the wall directly, discuss the exact material and exposure with the supplier rather than assuming a lighting choice establishes any fade resistance.
Very shallow light across a wall can reveal surface irregularities and raised panel edges. If that effect is undesirable, test the angle on a prepared sample area before installing a fixed fitting. Lighting cannot correct a poorly prepared substrate; it can make imperfections easier to notice. Confirm the installation requirements for the particular wallcovering independently of the decorative lighting plan.
Decide whether a picture light belongs here
A picture-style fitting suits a full-wall mural only when its limited coverage is the effect you want. In the feature photograph, it picks out the upper trees while the table lamps keep the lower room usable. That layered result is coherent because the wall does not have to be uniformly bright. If your goal is to reveal a broad architectural scene, a small picture light alone is unlikely to do the same job.
Before buying one, test the room in three states: ordinary evening lighting; ordinary lighting plus a portable accent source aimed at the wall; and the accent source alone. Compare the entrance and the main seat in each state. If the second arrangement helps without glare, you have a clearer brief for a fixed fitting. If the first is already good, the most considered lighting plan may be to leave the mural alone.
Have new wiring and permanent fixture placement handled by a qualified electrician in line with local requirements. Follow the fitting manufacturer's mounting and clearance instructions, especially for any lamp close to the wallcovering. The mural is an image surface, not a heat shield. A good final check is simple: with the room occupied, can people read, move about and see the artwork as intended without staring into a bright source?