How to Plan Mural Wallpaper Around a Radiator
Measure the wall carefully around a radiator and consider access, heat, brackets, pipework and the visual crop.
Article focus: pricing and measurement
Budgeting this wall with confidence
Start with accurate wall measurements; the final custom mural price depends on area, material and any finishing options.
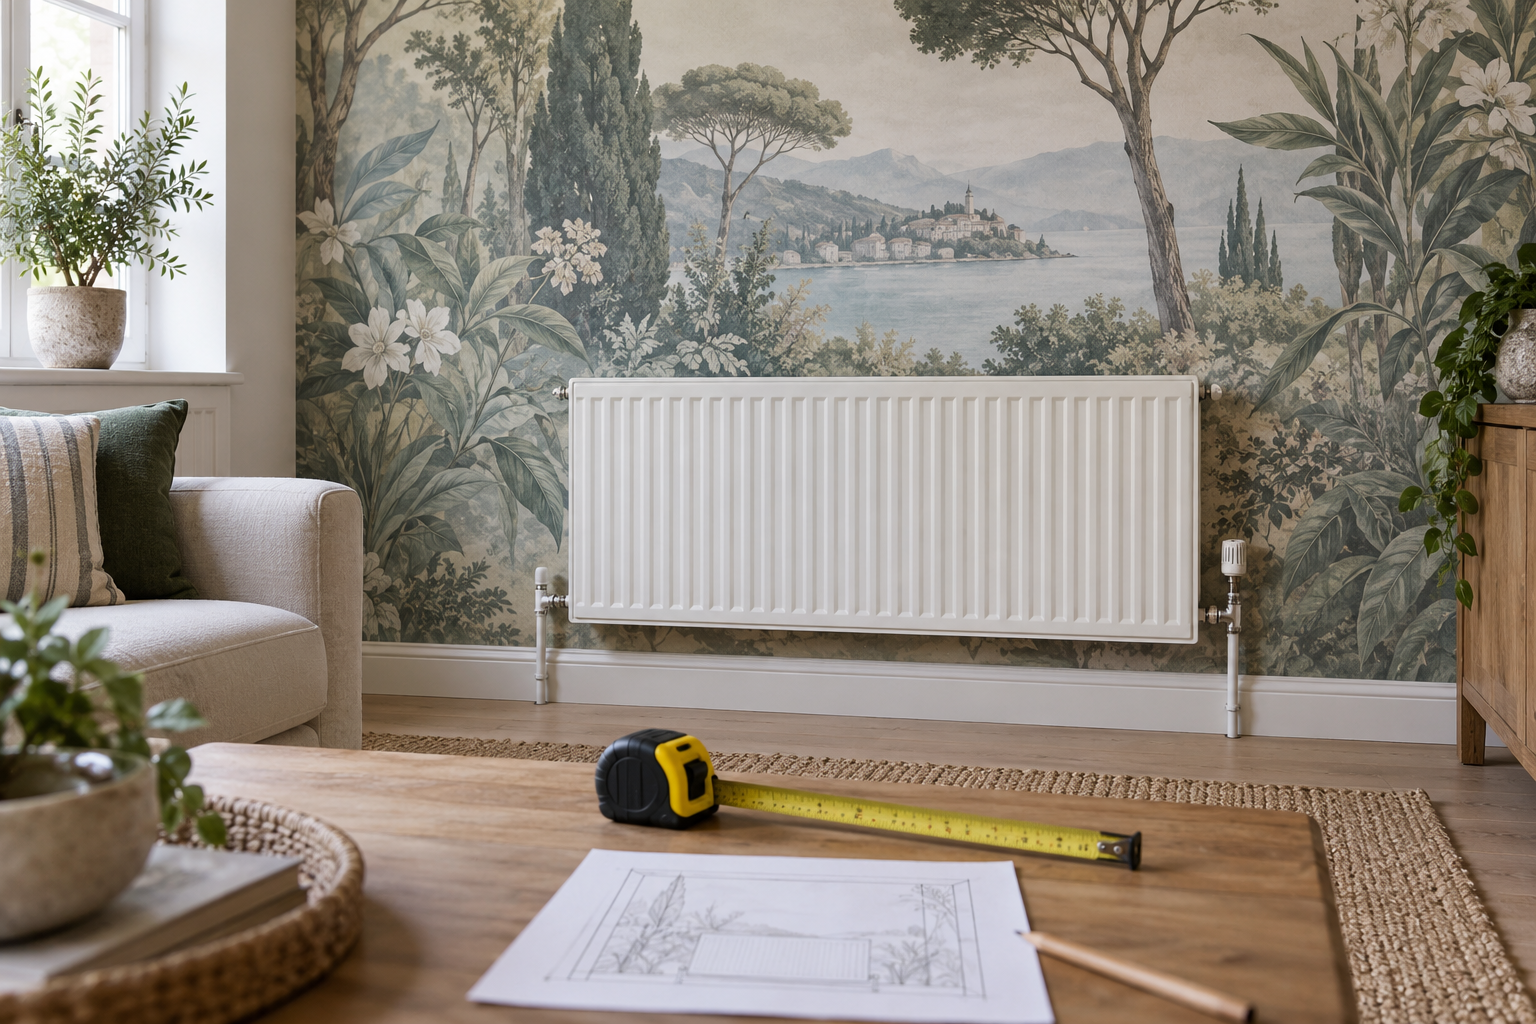
Example application: Any room with a suitable, prepared wall · pricing and measurement
A radiator can interrupt a wall mural at exactly the point where the design was meant to draw the eye. Planning around it is less about hiding the radiator than deciding what remains visible, what needs access, and whether the chosen wallcovering is appropriate near that heat source. Make those decisions on a measured wall elevation before approving the crop or ordering panels.
Draw the wall as it actually exists
Measure the complete width and height of the intended mural surface, then record the radiator's width, height, and position relative to the wall edges and floor. Mark valves, exposed pipes, a thermostat, nearby sockets and any projecting windowsill. Note whether the radiator can be accessed from above or the sides for cleaning and future maintenance. A quick photograph with a tape measure in frame helps an installer or supplier understand the obstacle, but it does not replace written dimensions.
Do not order a mural to fit only the visible space above the radiator without first deciding how the lower portion of the design should behave. A full-wall composition may look coherent from a distance even when its bottom section disappears behind the appliance. Ordering separate rectangles around the radiator, by contrast, may introduce alignment problems at the edges. Ask for a crop preview of the complete wall with a radiator outline drawn over it.
Use a fixed reference point for every measurement. For example, record the radiator's left edge as a distance from the same wall corner used for the mural width, then measure its top from the finished floor. If the wall is 320 cm wide and the radiator begins 105 cm from the left and spans 110 cm, the concealed horizontal band runs from 105 to 215 cm. A focal detail centred at 160 cm near radiator height would disappear. The point of the numbers is not to prescribe a layout; it is to make the obstruction visible on your drawing before a custom print is produced.
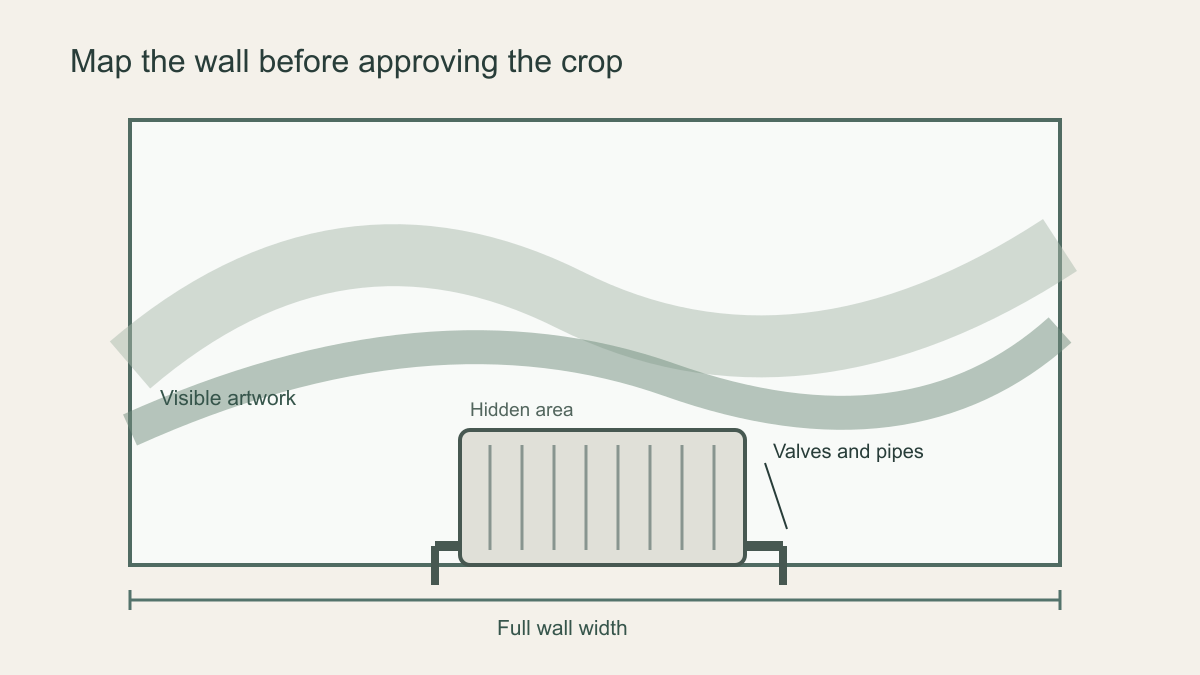 A wall elevation identifies the area hidden by the radiator before the image crop is approved.
Protect the picture's focal point
A landscape horizon, a face, a large flower or a central architectural feature should not be bisected by the radiator unless that interruption is intentional. A diffuse woodland, textured abstract or repeated botanical may tolerate the break more gracefully. Check the composition from the room's main viewing position. The visible strip between the radiator and the ceiling often carries more visual weight than the small section immediately behind the appliance.
If the radiator is off-centre, do not automatically centre the mural on the appliance. The wall, bed, sofa or doorway may set a more convincing axis. Place a scaled radiator outline over the available crop preview; ask the supplier for help if the image position is unclear. Shift or scale the artwork only where the design and print resolution permit. A mock-up that omits the radiator makes it too easy to approve an attractive image that will not read well after installation.
The upper edge of the radiator is often the most noticeable interruption because it draws a long horizontal line across the print. Check whether a horizon, branch or architectural ledge will appear to collide with that line. If it does, try moving the artwork vertically on the proof or choosing a composition whose important details sit to one side. Do not stretch the image disproportionately to rescue one object: trees, buildings and people will look distorted elsewhere. A crop can be changed only within the source artwork's available area and resolution.
Decide what happens behind the radiator
There is no universal instruction to wallpaper behind every radiator. The answer depends on the access, the appliance, the wallcovering system and the installer. If the radiator stays fixed, the installer may be able to work a limited distance behind it with suitable tools; a full, neat application may be impossible. If removal is proposed, a qualified person must assess and handle the heating system. Do not loosen valves or disconnect pipework merely to fit a decorative wallcovering.
Agree on the intended cut line and any panel join before printing; otherwise two installers could interpret “behind the radiator” differently. Wallpaperdirect's guide to tricky areas illustrates why this is not the same straightforward run as an open wall. The heating engineer, not the decorator, should decide whether the appliance can be moved.
Continue behind: this can preserve the complete print if the radiator can be safely removed or there is adequate access for the specified material. Agree in advance who handles the heating system and whether the chosen wallcovering is approved for the location. Concealed stop: a planned edge may reduce work behind an inaccessible unit, but it must stay hidden from normal sightlines, including from a doorway or beside the radiator. Separate finish: paint, panelling or another approved wall treatment below a deliberate boundary can make future access simpler. Each route changes the visual result and the required preparation.
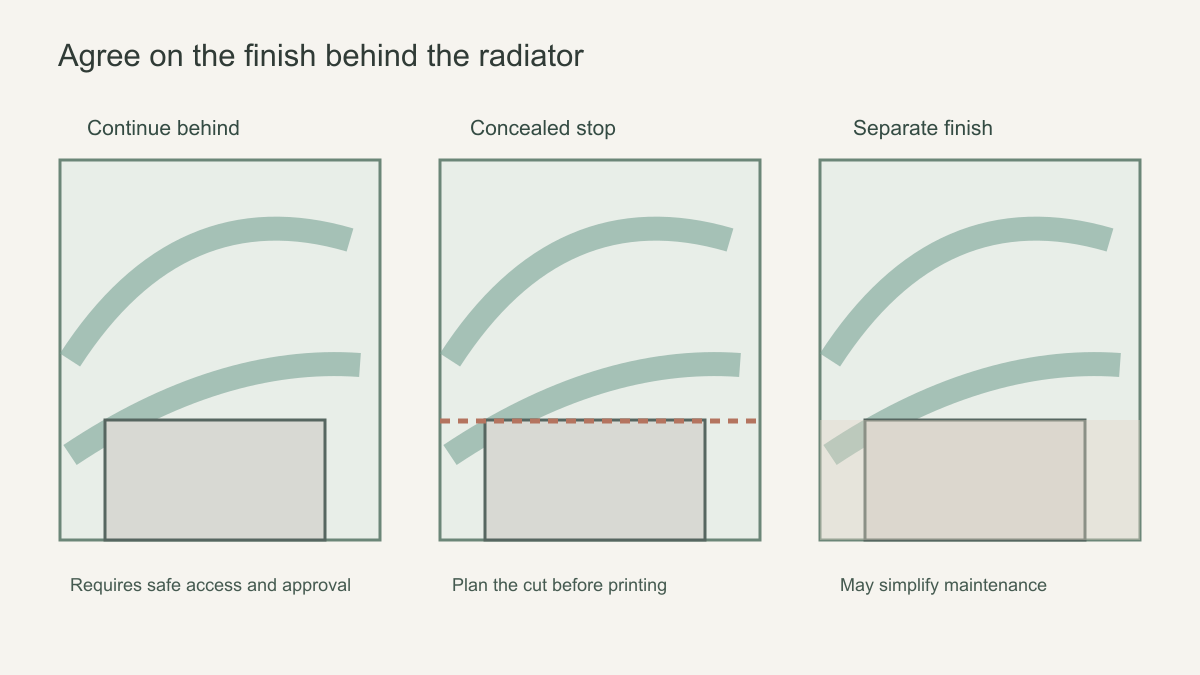 Agree on the treatment behind the radiator before fixing panel positions.
Check heat, material and clearances with the right people
Wallcoverings vary in their backing, surface finish, adhesive and recommended environment. A mural described as non-woven, vinyl or peel-and-stick is not automatically approved for every temperature or every position behind a radiator. Ask the mural supplier for product-specific guidance about the selected finish and adhesive near a working radiator. If no relevant temperature or clearance guidance exists, do not invent a safe distance from a generic internet rule; involve the appliance manufacturer and installer.
Never cover vents, valves, thermostats or inspection points with wallpaper, trim or a decorative panel. Keep the radiator's intended airflow and service access. If heat, a leak or condensation has already damaged paint or plaster, identify and repair the cause before covering the wall. The Wallcoverings Association's surface-preparation guidance calls for a sound, clean and dry surface; a mural is not a remedy for unstable paint or damp plaster.
Identify the appliance type before planning access. A water-filled radiator with pipe connections raises different removal questions from an electric unit with wiring. Neither should be disconnected as part of wallpaper hanging by someone unqualified. Manufacturer instructions also govern the space around the appliance; a generic gap found online cannot account for every model or for a cover installed later. If a radiator cover is planned, include its full footprint in the drawing because it may hide far more artwork than the radiator itself.
Prepare and install without working against the appliance
Turn the radiator off and allow it to cool completely before preparation or installation. Protect the floor, remove dust from the wall and accessible radiator surfaces, and follow the covering and adhesive makers' instructions. Graham & Brown's radiator-work guidance likewise begins with switching off and cooling the radiator, a sensible precaution whenever hands, tools or paste will be close to it. Electricity and plumbing work remain separate trades.
Dry-check panel order and the position of major motifs before applying anything. For a full-height mural, align the printed panels according to their numbering and product instructions; avoid stretching a sheet merely to chase the design behind a pipe. Where trimming around a bracket or pipe is necessary, an installer should use the correct method for that specific product and maintain the intended seam. Resist using an uncontrolled cut that leaves a visible gap at the radiator's upper edge.
The wall behind an existing radiator can be harder to inspect and clean than the open wall. If there is grease, old adhesive or heat-affected paint, preparation may take longer than expected. Discuss that access at quotation stage. Plan how the result will be checked after the radiator returns to service, including whether any edge can be seen or reached safely. Do not force an adhesive film or wallpaper into contact with hot metal, valves or pipe connections.
After the system returns to normal use, look at the visible edges rather than assuming that an initially neat installation will remain unchanged. If an edge lifts, discolours or feels affected by heat, stop and seek product-specific advice instead of adding a random adhesive. Keep the mural material, primer and adhesive names with the installation record so that the supplier can identify the actual system. This is particularly useful when the radiator is replaced later by a wider or taller model: a once-concealed cut line may become visible.