How to Install Mural Wallpaper Above Skirting Boards
Coordinate the lower edge, trim line, skirting profile and panel position for a clean transition at floor level.
Article focus: pricing and measurement
Budgeting this wall with confidence
Start with accurate wall measurements; the final custom mural price depends on area, material and any finishing options.
Example application: Any room with a suitable, prepared wall · pricing and measurement
A skirting board is the visible lower boundary of a mural, not the line that should steer its panels. Even a neatly painted board may rise or fall across a wall. Measure to its top at several positions, protect any important artwork from the hidden lower band, and hang the numbered panels vertically before trimming the surplus. The cut follows the wall-to-board junction only after the image is aligned.
Measure the wall, not just the gap above the trim
Measure from the intended top of the mural to the top of the skirting at the left, centre and right, adding readings where the line visibly changes. Record the shortest and longest distances, then mark any sockets, radiator pipes or built-ins close to the base. A deep or stepped moulding matters because its top junction, not a decorative groove below it, is where the wallcovering will end.
Give the mural supplier the wall dimensions requested by its ordering process and follow its stated installation allowance. A made-to-measure print may include extra material for trimming, but the amount and where it is distributed should be confirmed rather than assumed. For conventional wallcovering, the Wallcoverings Association's residential installation guidance describes leaving surplus at the ceiling and baseboard and trimming after hanging. A custom mural's panel plan may differ, so its own instructions govern.
Put the readings on a sketch rather than reporting one nominal height. If the visible distance is 242 cm on the left, 241 cm in the centre and 243 cm on the right, tell the supplier all three values and follow its ordering and trim-allowance method. Do not order three independently scaled panels: the picture must still register from one strip to the next. The variation tells you how much of the approved lower crop could be lost during finishing.
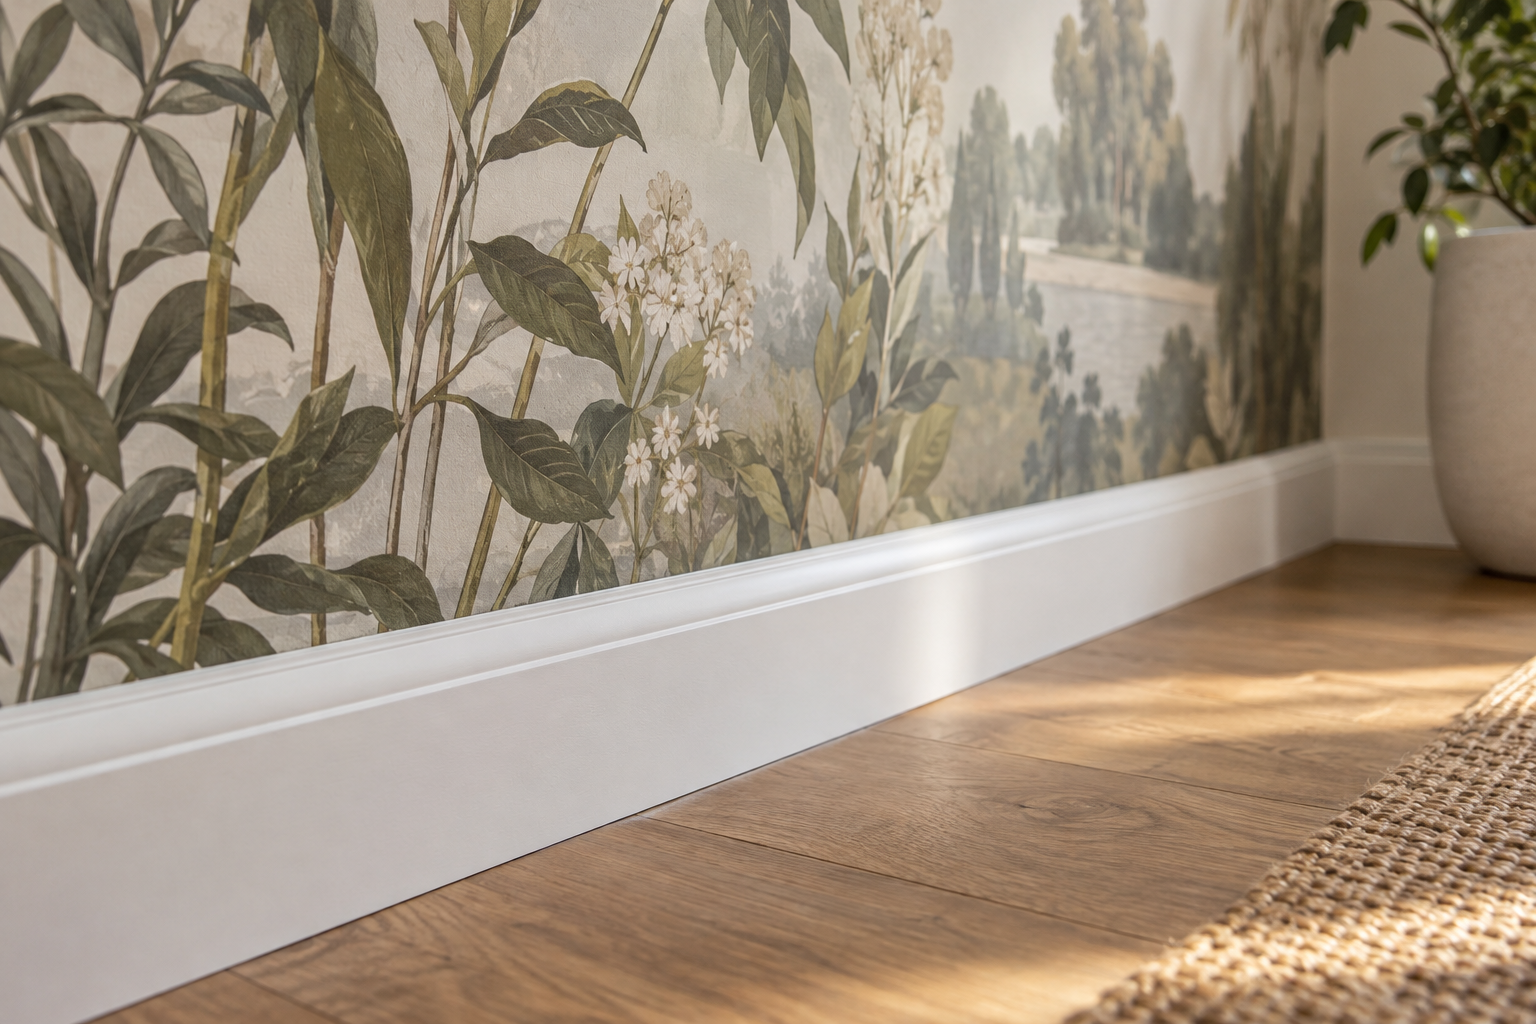
Draw the skirting's top line across a full-wall preview and shade the part of the image that will not be seen. In the feature photograph, foliage and pale flowers remain recognisable above a tall white board, while some stems disappear at the base. If the lowest subject were a small animal, a narrow path or a signature detail, that concealment would matter more. Ask for a crop adjustment before printing if the lower subject needs more breathing room.
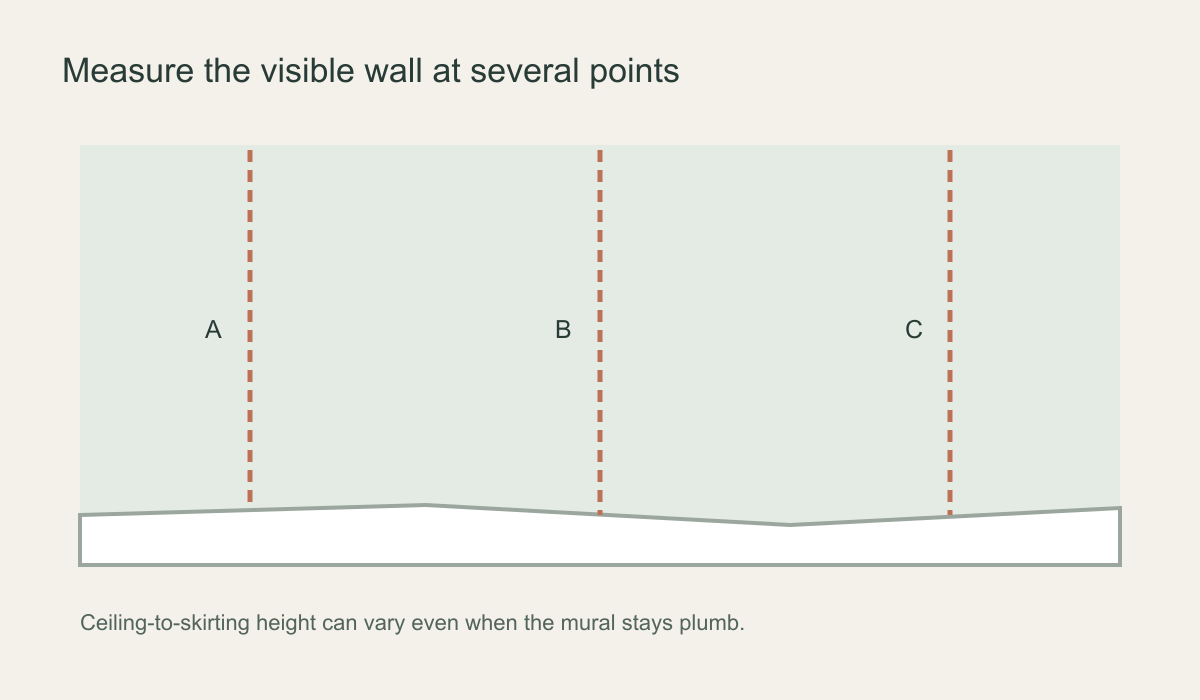 Check the bottom boundary at several points before approving the mural crop.
Start from a vertical reference
The top of the skirting may look straight but can be out of level. It should not set the direction of the first panel. Establish a true vertical guide as directed by the manufacturer, then position the first numbered panel against it. Keep the image joins aligned as you work across the wall. A narrow drift at the first panel can become obvious at the last, particularly in a landscape with a horizon or a design with vertical lines.
While positioning a panel, leave its specified surplus over the lower boundary and smooth the wall area with the method recommended for that material. Do not pull the bottom to meet an uneven board; that can distort the print and shift a join above. A paste-the-wall product and a peel-and-stick sheet require different adhesive handling, but neither should use the skirting as the alignment guide.
Before trimming, check a tree trunk, column or geometric line across each seam at eye level. If the image has drifted, correct the panel position within the product's permitted adjustment window while the surplus is intact. At a corner where two boards meet at different apparent heights, keep the last panel plumb and resolve only the short trim junction locally. If the board is loose or due for replacement, finish that building work first; temporary trim makes the final visible wall height uncertain.
Make the lower cut only after the panel is seated
Once a panel is correctly positioned and smoothed, gently define the junction where wall meets skirting. Use the straightedge, broad knife or trim guide recommended by the supplier, with a sharp blade suitable for that material. Keep fingers and the printed face clear of the cutting path. The Wallcoverings Association describes trimming at the baseboard with a broad knife and razor knife after the wallpaper has been hung.
Use a fresh blade when the edge starts to drag; a dull one can tear fibres or pull the material away from the wall. Test the selected guide and blade on a spare offcut if the technique is unfamiliar, and avoid scoring the painted trim or wall. Work along the actual wall-to-board junction in controlled sections. A cut above it exposes a pale strip of wall; a cut into a lower decorative groove takes the picture onto painted wood.
The skirting in the photograph has a moulded top and a lower groove. Only the upper wall-to-trim meeting line is the finish line. Where the profile changes near a corner or doorway, pause and reposition the guide rather than carrying a straight cut across a step. If the print has already been cut short, extra paste will not fill the gap; ask the supplier or installer about a sound correction before removing more material.
Keep the trim clean without scrubbing the print
If you are using paste, remove residue from the skirting as the product instructions direct. The Wallcoverings Association specifically calls for cleaning paste from the baseboard after hanging. Protect the printed surface and check the wallcovering's cleaning guidance; some matte finishes may mark if rubbed while wet. For peel-and-stick material, keep dust and debris off the adhesive and the trim rather than using water or paste-cleaning methods intended for another product.
Flaking paint, failed caulk or a loose board should be repaired before the mural goes up, with coatings allowed to cure as their manufacturers direct. A clean printed edge cannot disguise a moving or unsound boundary. Keep the finished trim clean, but do not scrub an unfamiliar matte print simply because conventional wallpaper advice calls for rinsing paste from surrounding surfaces.
What about a wavy floor or tall skirting?
If the visible wall height changes substantially, give the supplier the full set of measurements before printing. The normal surplus may not cover an unusually uneven line, and a taller board means less of the artwork will show. Do not assume the board's height from the floor: measure to its top. The mural remains plumb even when the lower cut becomes a shallow wedge.
A radiator, pipe boxing or built-in cabinet near the floor changes the visible crop as well. Photograph and measure the obstruction before ordering so the lowest important motif does not vanish behind it. Keep access to heating equipment and follow the product's instructions for that area; this article does not prescribe a cutting method around pipes. If the lower wall is crowded, a quieter portion of artwork may read better above the interruptions.
Check the finished edge without chasing the skirting line
Inspect the final cut close up at the wall-to-trim junction, then step back and check the picture across the panel joins. Wedge-shaped offcuts can simply reflect a varying skirting height; a drifting horizon or vertical motif instead points to an alignment issue. Keep the offcuts and panel numbers until the wall is complete, and resist a second aggressive cut to disguise a poor join. The board determines where the surplus ends, not the direction in which the mural hangs.