How to Finish Mural Wallpaper at Corners
Plan internal and external corners, panel direction, trimming and the condition of the adjoining wall before installation.
Article focus: pricing and measurement
The cost and measurement decision
Start with accurate wall measurements; the final custom mural price depends on area, material and any finishing options.
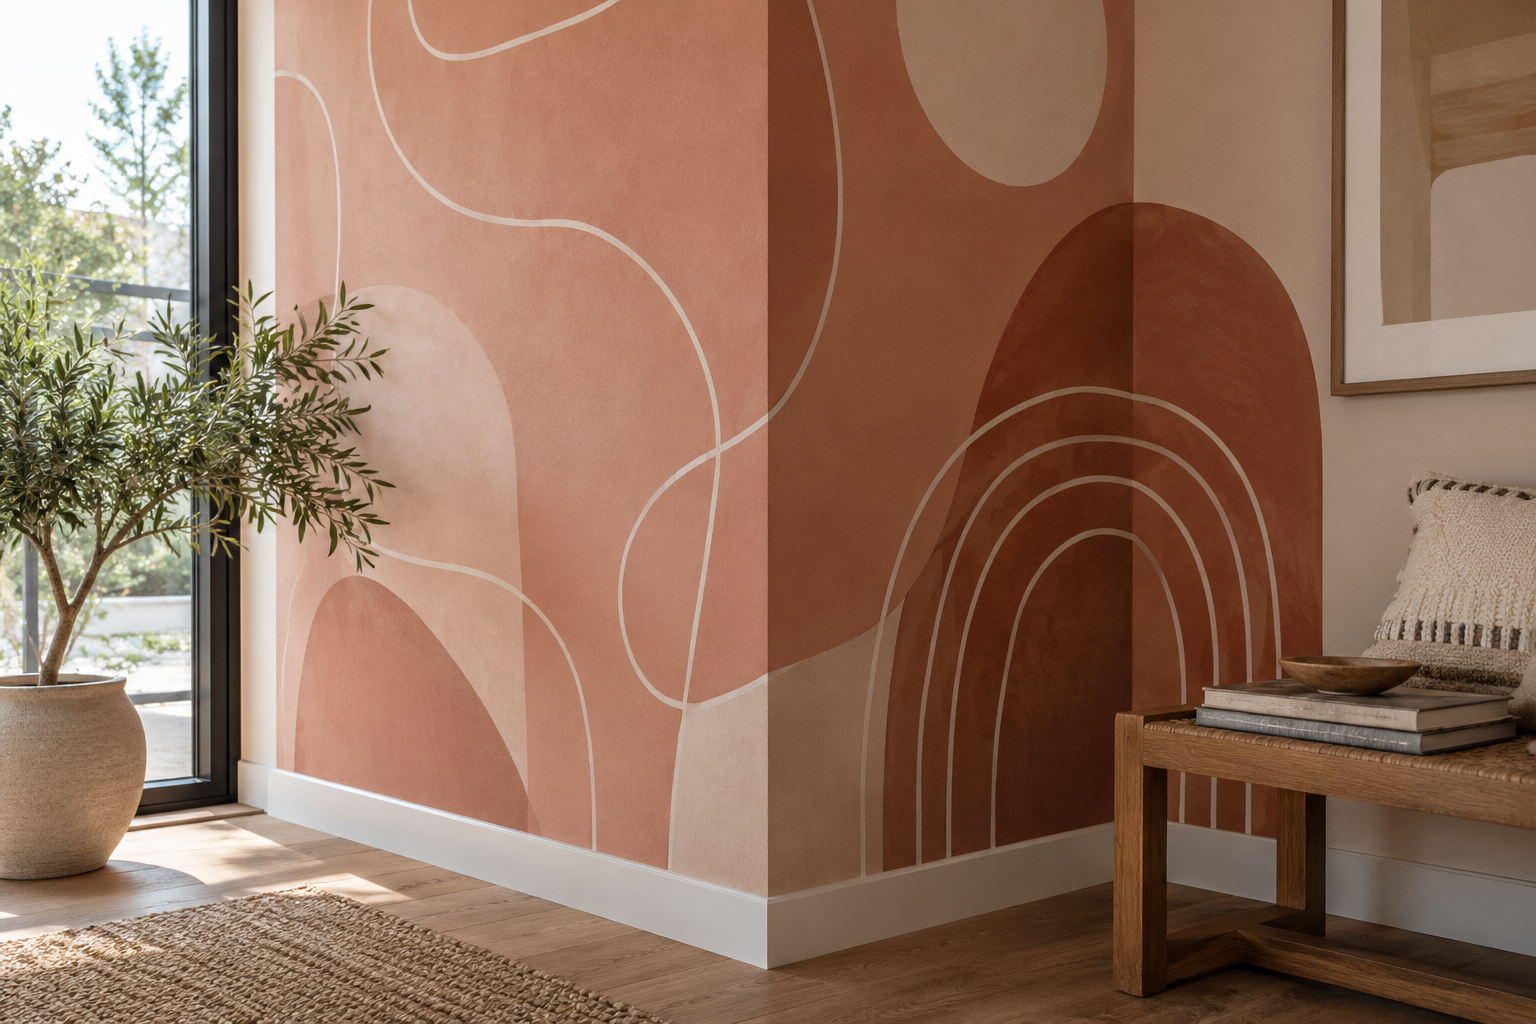
Example application: Hallway or entryway · pricing and measurement
A corner is where a mural's flat image meets the room's imperfect geometry. Even a wall that appears square can taper slightly from ceiling to skirting, and a panel kept straight on one wall may seem to drift on the next. A neat finish therefore starts before the knife reaches the corner: decide whether the design should stop there or continue around it, where a seam can fall and which part of the image must remain visible.
Know the approved boundary before finishing it
Bring the approved print plan to the actual corner. Does the mural stop there, or does a specified panel continue onto the return? The installer needs that answer before choosing a cutting position or a new vertical reference. The two-adjoining-walls guide covers the earlier design decision and separate measurements for each plane. Here the question is whether the delivered material and its numbered sequence implement that decision at this physical corner.
Stand on each side of the bend and inspect the proposed stop line. A cut that disappears when viewed square-on may leave a coloured sliver on the painted return; a line that finishes exactly at a projecting edge may be conspicuous from the doorway. The pictured terracotta forms continue across an outside corner, but that image is a design example, not a universal instruction to wrap a panel. The approved artwork boundary must agree with the wall that is actually being covered.
Check the last seam and the next plumb line
At the top, middle and bottom, measure the distance between the last planned seam and the corner. Compare those readings with the width of the supplied panel that must reach the bend. If the gap changes substantially, a full panel pushed into the corner may leave its far edge out of plumb. Mark a separate vertical reference on the next wall; the corner itself is not that reference. The supplier's panel map and material instructions determine whether a turn, overlap or separate drop is appropriate.
The Wallcoverings Association's guide to special areas describes general inside- and outside-corner methods, including restarting from a fresh plumb line. Those principles are useful, but a made-to-measure image can lose a branch or contour where a conventional repeat could hide a small overlap. Before cutting, compare the printed landmarks on both sides of the planned junction with the approved proof. If the overlap or narrow strip is not represented in the supplied layout, pause and ask the supplier or installer to reconcile it.
Make a dry positioning check before adhesive or backing removal. Hold the numbered pieces in the planned order, verify the top and bottom trim allowance, and see where the next panel's edge lands against a level. This is the point to discover a taper, a sloping ceiling or a door trim that interrupts the planned turn. Moving a panel slightly within its approved crop may help; pulling it wider to meet a printed line does not produce a reliable match.
Inside corners: protect the next wall's alignment
An inside corner is the recessed meeting of two walls. It may look like a simple fold, but a heavy or stiff wallcovering can resist being pressed into it, leaving a rounded bridge or trapped air. A very thin strip on the next wall can also be difficult to secure. The installer should use the product's recommended method for the specific finish, including any adhesive needed where materials overlap.
After the first wall reaches the recess, treat the adjoining wall as a new plane. Confirm the specified turn or overlap, then use a fresh level line to place the next panel vertically instead of following a crooked corner. The Wallcoverings Association's plumb-line guidance explains why a corner is not a dependable starting line. Its general overlap dimensions are not a substitute for the cut map supplied with a custom mural.
Look closely at whatever crosses the recess. A trunk, horizon or straight architectural line makes even a small loss of image obvious; a diffuse sky or wash tolerates a visual break more easily. If a planned overlap would remove an important landmark, stop while the margins are intact and ask the supplier to confirm a different split. If the substrate is uneven enough that the material bridges rather than seats into the corner, preparation or professional advice is more useful than harder smoothing.
Outside corners: account for exposure
An outside corner projects into the room. It is more visible and more likely to be brushed by people, furniture or cleaning. A mural that ends on that edge needs a finish suited to its material and the room's use. A mural that wraps around it needs good contact at the turn without trapped air. The Wallcoverings Association specifically notes eliminating trapped air when hanging around an outside corner; it also discusses trimming when the paper ends there.
Whether to stop at the projecting edge or carry the print onto the return is partly a composition decision. In the pictured room, broad terracotta fields survive the turn, while pale lines visibly change direction with the wall planes. That is more convincing than expecting a curved line to read as flat from every viewing point. If the print must end there, agree on the material-specific trim position before cutting; an exposed edge is not a place for a ragged offcut.
A corridor corner is also a contact point for passing furniture and people. Ask whether a compatible corner guard or trim is appropriate, and include its visible width in the crop decision. It may cover a pale line or part of a motif, so protection is not visually neutral. No guard should be assumed to be included with the mural. For a quiet, low-contact wall, a clean exposed finish may preserve more of the artwork, subject to the product instructions.
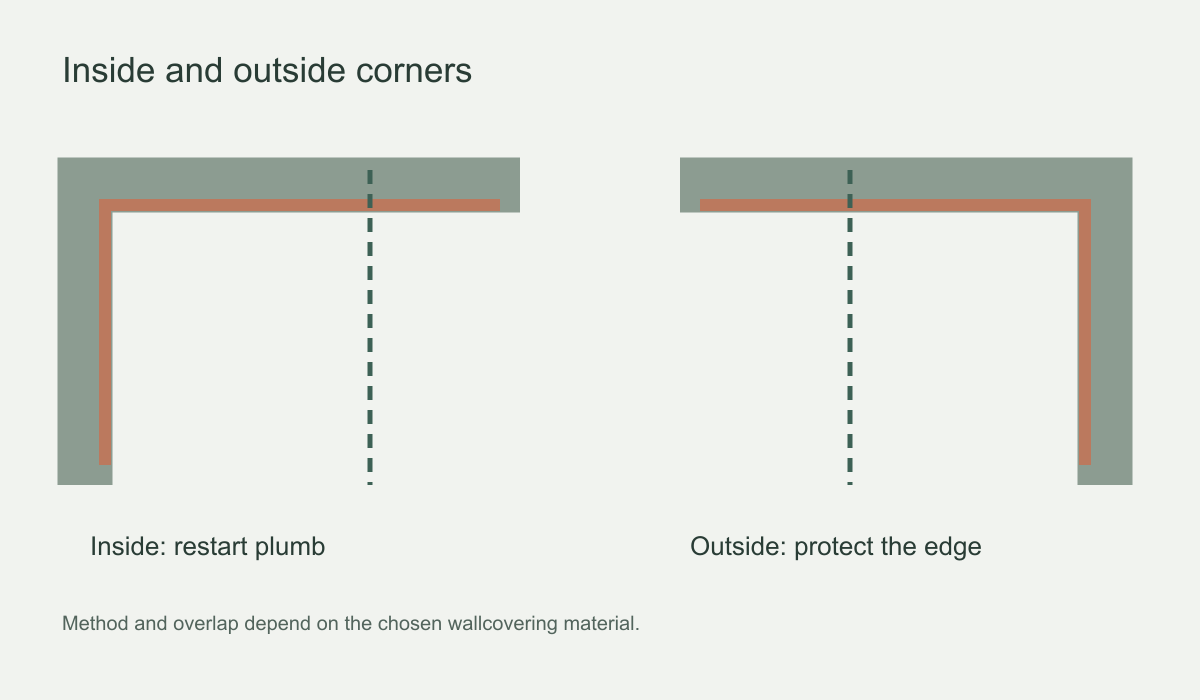 At an inside corner, restart from a vertical reference; at an outside corner, plan the exposed edge.
What to check before making a cut
Before the first cut, point to the intended seam, the corner line and the first full panel on the next wall. If those three positions cannot be marked on the print plan and matched to the wall, the finish is not yet resolved. A seam stranded a few centimetres from the bend can leave an awkward narrow strip; the Wallcoverings Association's hanging-process guidance recommends planning seam positions around obstacles before installation. Confirm the specific trim allowance and check the corner under the room's normal lighting.
Use only cutting and smoothing methods approved for the material. A pasted non-woven print, a vinyl-faced product and peel-and-stick material may not behave the same way at a tight turn. A sharp blade can damage the wall or cut the layer underneath; a blunt blade can tear the image. If a switch, socket or radiator lies close to the corner, plan that obstacle too instead of treating it as a last-minute exception.
Do not transfer a standard overlap measurement from a repeat-pattern wallpaper guide onto a bespoke image without checking the supplied layout. A print made for one flat wall may not have enough artwork to cover a return and still finish correctly at its opposite edge. If the plan leaves that uncertain, resolve it before panels are pasted or backing is removed; a wider cut cannot create missing image content.
When a corner finish looks wrong
Diagnose the defect before reaching for the knife. View each wall face straight on, then stand at the usual entrance. If a line meets on both flat planes but seems bent only from the doorway, the change may be perspective rather than a misplaced panel. If it fails to meet when either face is viewed square-on, recheck the approved crop, panel order and plumb start. A loose lip is a different problem: inspect the substrate and the material-specific edge method. Do not conceal dampness or failing paint with extra adhesive.
Photograph the corner from both faces and the doorway, showing the panel numbers if possible, before asking the supplier or installer about a remedy. A second cut cannot put a missing branch back into the image and may remove the margin needed for an orderly correction. For a mural intended to stop at the bend, the successful outcome is a deliberate, clean boundary. For one intended to continue, it is a sound physical turn and a visual transition that matches the approved layout, not an illusion that two wall planes are one flat surface.