Can Mural Wallpaper Be Made for Sloped or Angled Walls?
How to plan a mural for attic rooms, staircases, sloping ceilings and other non-standard architectural surfaces.
Article focus: pricing and measurement
What to settle before pricing
Start with accurate wall measurements; the final custom mural price depends on area, material and any finishing options.
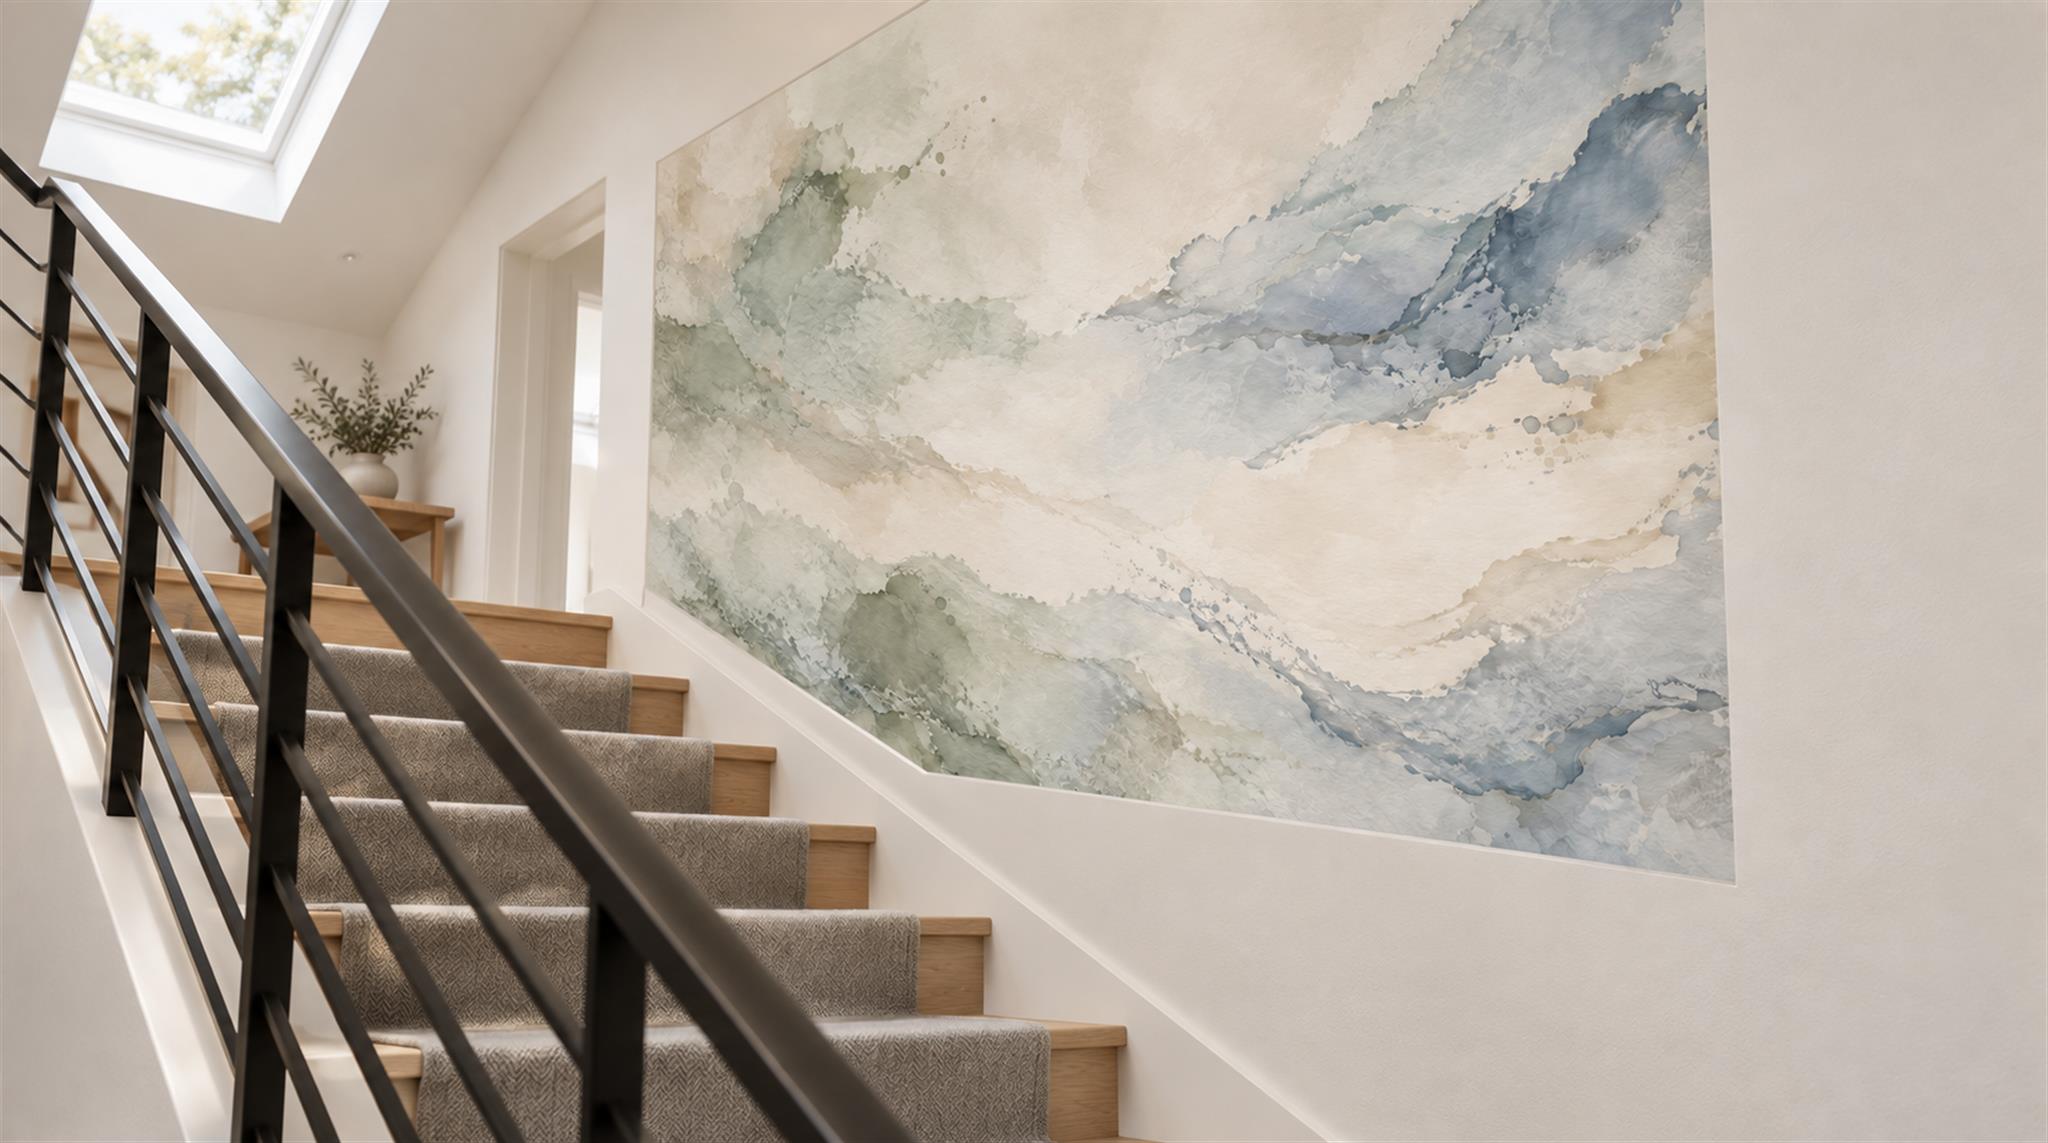
Example application: Any room with a suitable, prepared wall · pricing and measurement
Yes, a mural can cover a sloped or angled wall, but the online width-and-height entry describes a rectangle, not the final cut line. An attic gable or stairwell may use a full rectangular print with a substantial portion trimmed away during fitting. Mark every point where the slope begins, ends or changes direction from one reference corner. Overlay that outline on the crop so a bird, face or mountain peak does not fall into the portion that will be removed.
Decide what the finished wall will actually show
Before choosing an image, trace the visible wall area on a photograph taken as straight on as possible. Include coving, skirting, a headboard or a handrail if any of these will cover part of the mural. This is a design boundary, not an instruction to print a triangular sheet. On a gable, the peak may be off-centre; on a stairwell, the diagonal may interrupt the wall more than the room photograph first suggests. A design that looks balanced inside the printer’s rectangle can look lopsided once the offcuts are removed.
Identify the view that matters most: from the bed, the doorway or the stair landing. Mark the subject that must remain visible from that position, then test several crops inside the traced shape. A small branch or soft texture may tolerate a diagonal cut; a face, architectural line or isolated bird needs more clearance. If the roofline changes direction, request a supplier proof using the actual outline rather than relying on a rectangular preview alone. For the separate task of recording each dimension and ordering the enclosing rectangle, see how to measure a sloping wall for a mural.
Understand the rectangular print behind the angled wall
A printer may prepare the artwork in a rectangle enclosing the entire irregular shape. That lets the panels be manufactured and aligned in a normal sequence; the excess above the sloping edge is cut away during installation. You may pay for material that is not visible once fitted. This is not necessarily an error—it can be the practical way to preserve alignment—but ask how the chosen seller calculates size and price.
Alternatively, a specialist may plan separate shaped panels or a different sequence if that service is available. Do not assume the online width-and-height form understands your roofline. Entering only the longest width and tallest height could place the main subject in the area that will be cut away. Draw the finished outline over the rectangular crop yourself, then ask the supplier whether it can confirm the proposed layout before production.
For a Solowalls order, add about 10 cm (4 inches) to both the maximum measured width and height entered at checkout for installation trim. This is the ordinary rectangular-wall allowance, not a promise that a steep slope, irregular roofline or unusual crop will fit automatically. Confirm the actual print rectangle, safe trimming area and focal-point position with the seller and installer before production. A large triangular offcut is a composition question as well as a size question, especially if a face, lettering or hard horizon approaches the slope.
Choose a design that survives the cut
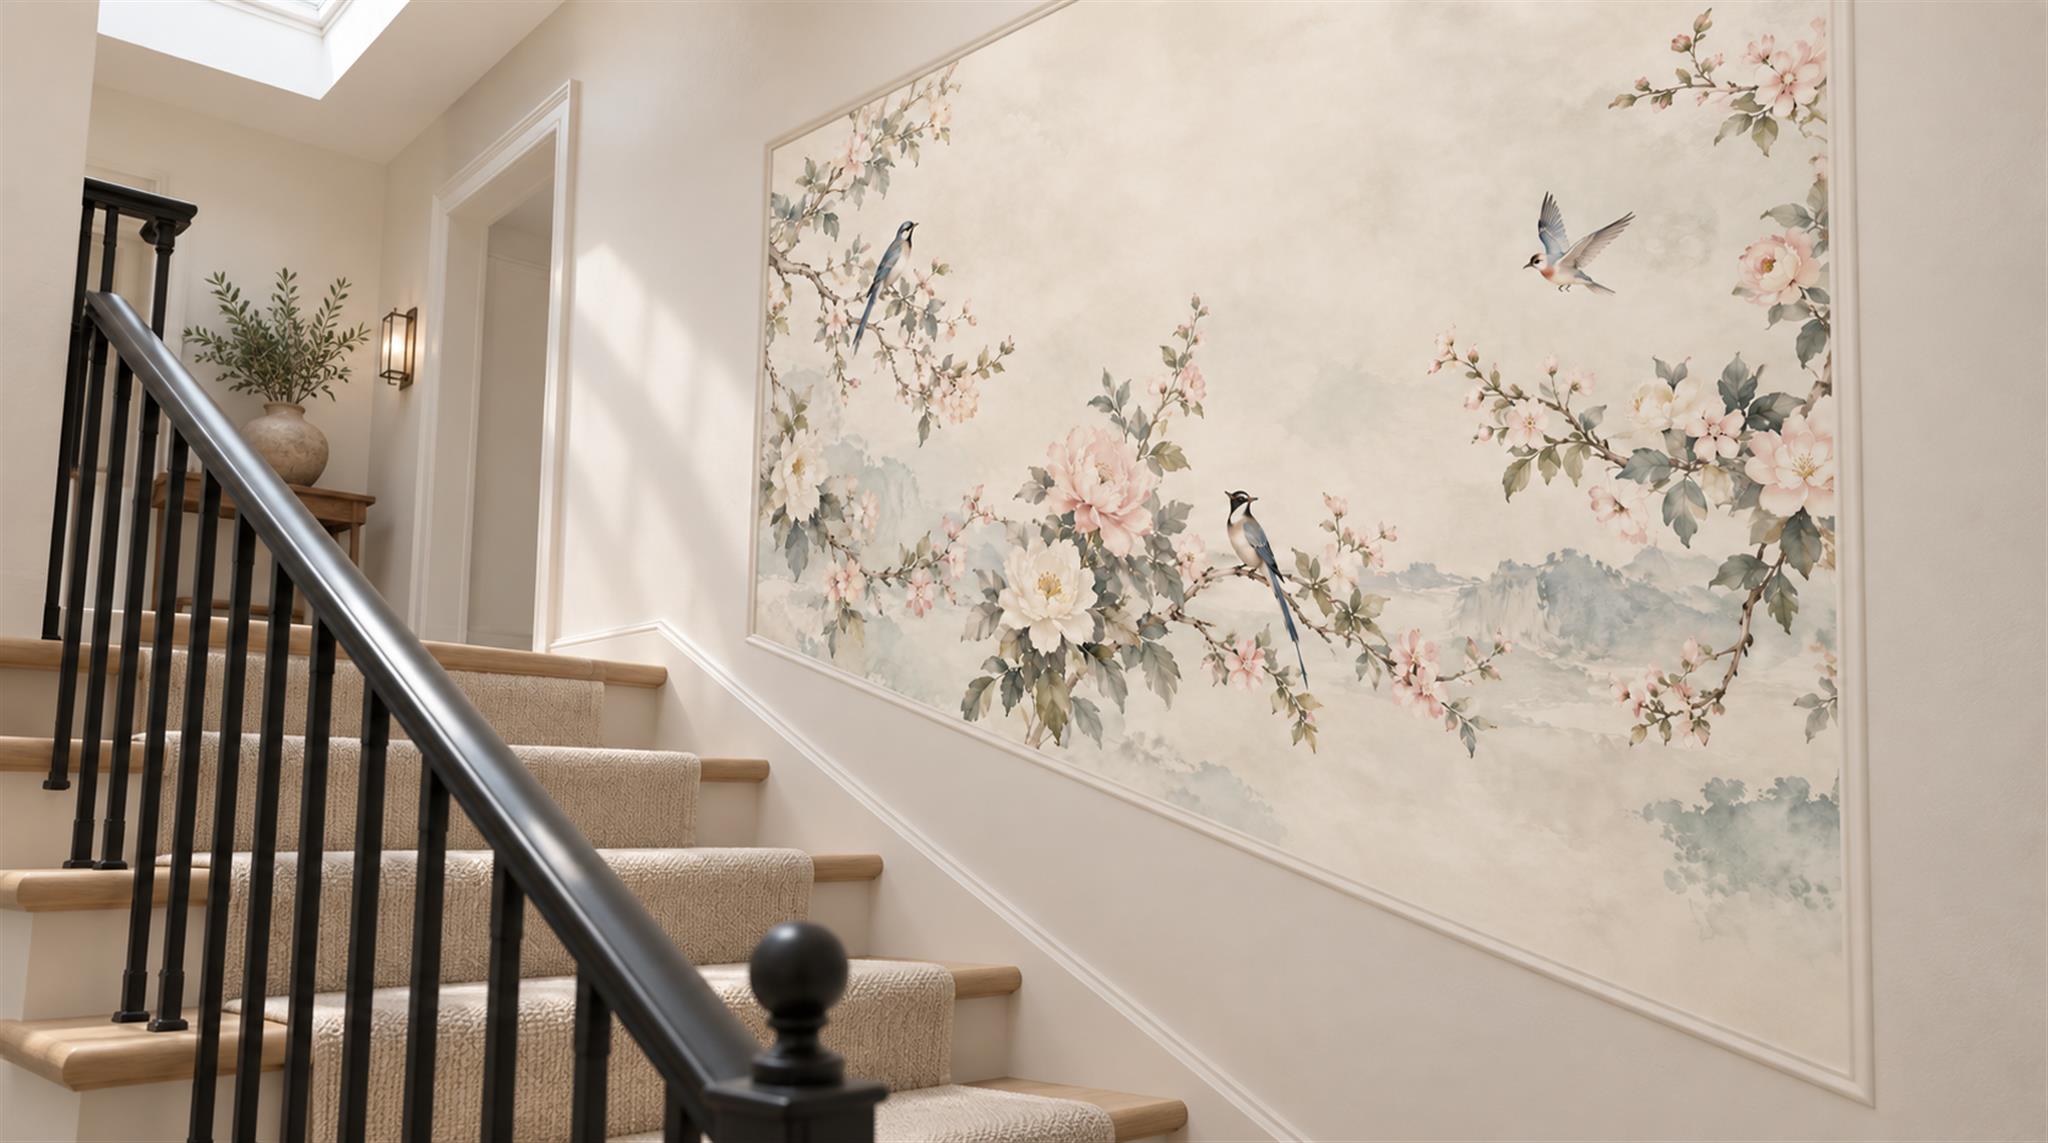
Sloping edges can remove a large wedge of artwork. A central tree, mountain peak or single animal may be lost if placed in that wedge. Look for a composition whose important detail sits in the guaranteed visible area. Open sky, pale wash, texture or foliage may be better near the cut line because they can be trimmed without making a subject look accidentally severed.
The slope can also become an intentional part of the design. A rising landscape can follow the movement of a stair, while a botanical canopy can gather near the high end of an attic wall. This does not mean stretching the image to fit a triangle. Stretching changes proportions and can make people, buildings or plants look unnatural. Ask for a crop or repositioning within the original artwork, and check the scale from the room’s main viewing distance.
For a gable above a bed, draw the headboard on the same crop screenshot as the roofline. The bed may hide the lower centre while the roof removes the upper corners; the remaining visible zone can be much smaller than the enclosing rectangle. Reposition the subject within the available crop if the tool allows it, or ask whether a manual layout is offered. For a staircase, the most visible area may be from the landing rather than the bottom step. Choose the focal point for the actual view.
Plan panel positions and installation access
Ask how the panels will run. Vertical panels can work well on many angled walls, but short and tall drops will be cut to different final heights. Numbered order matters: do not rearrange panels merely because one looks more suitable for the tall end. If a roofline crosses a prominent detail, review where the panel seam and slope meet. A small adjustment in layout before printing may make installation easier.
Staircases bring a separate safety and access issue. Working at height over steps requires suitable equipment and often a professional installer. Do not use a household chair or an unstable ladder to reach a high angled edge. Measure and photograph the wall before ordering, then ask the installer what access they require. If the handrail has to be removed or worked around, plan that before the mural is printed and delivered.
Install on a clean, dry and stable surface following the wallcovering’s specific method. Align panels to a true vertical reference rather than the sloping edge, smooth them carefully and trim the slope after the artwork is positioned. The Wallcoverings Association’s installation guidance likewise calls for a plumb starting line and trimming at real architectural edges. Do not pre-cut every panel from a theoretical drawing if the ceiling line varies. Final trimming against the actual architecture is generally more forgiving, provided the print includes sufficient margin.

A pre-print checklist for unusual walls
Before approval, verify the wall sketch, maximum rectangle, every slope start and end point, print-versus-finished dimensions, trim allowance, panel order and focal-point placement. Check the preview against the actual triangular or stepped visible area, not merely the outer rectangle. Ask the supplier to confirm what the proof represents and whether the crop is approved for that particular wall shape. If an installer will fit the mural, have them review the same drawing. Keep all parties working from one approved version rather than separate sketches with slightly different numbers.
Do a final visual approval in two layers. First, inspect the full printed rectangle for panel order and continuous artwork; then place the finished-wall outline over it and mentally remove every offcut. Look again from the principal viewing position, allowing for furniture that hides the lower area. If the subject is clipped or the scale feels wrong, request a revised crop before production, not an improvised adjustment during fitting. Send the approved overlay to the installer as well as the supplier, so both know which marks represent print edges and which represent the final trim line. Keep the version identifier with the order; a later crop change can invalidate an earlier cutting sketch.