Paste-the-Wall or Peel-and-Stick Mural Wallpaper?
Compare handling, wall preparation, repositioning, removal and installation planning before choosing a mural substrate.
Article focus: pricing and measurement
Budgeting this wall with confidence
Start with accurate wall measurements; the final custom mural price depends on area, material and any finishing options.
Example application: Any room with a suitable, prepared wall · pricing and measurement
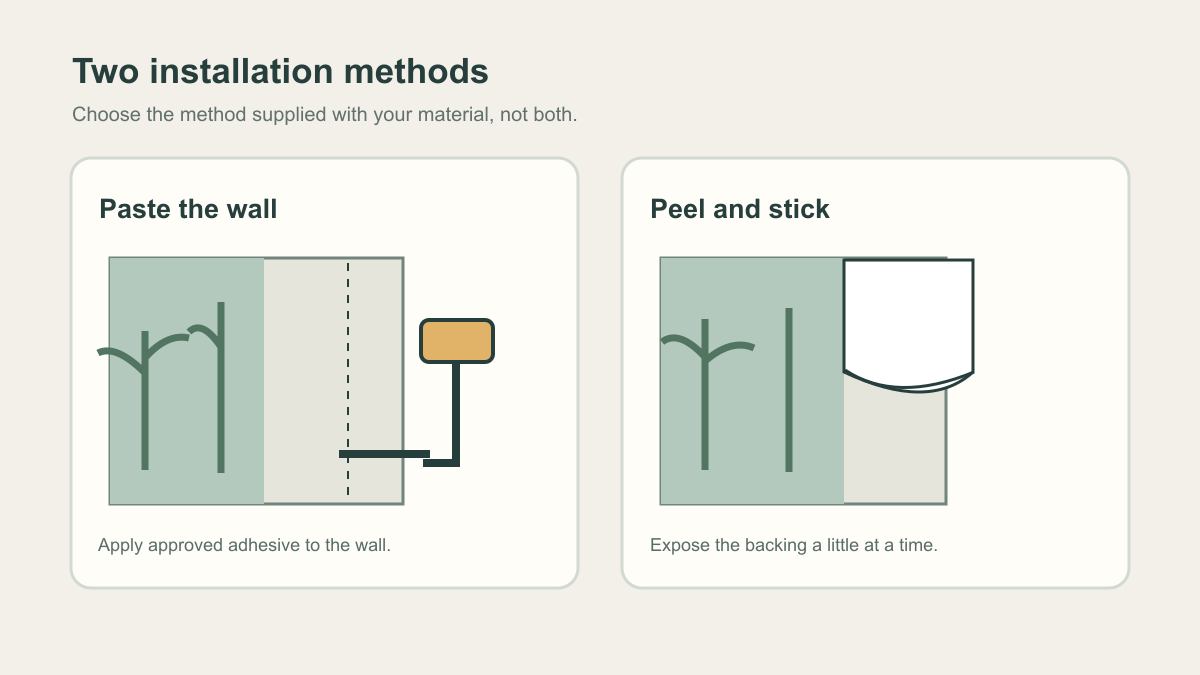
Paste-the-wall or peel-and-stick: which mural wallpaper should you choose? The artwork may look identical on screen, but the way the panel meets the wall is different. For paste-the-wall, you coat the prepared wall with the recommended adhesive and position a dry printed panel. For peel-and-stick, the adhesive is already on the panel beneath a liner that you remove in stages. The side-by-side illustration above shows this one essential distinction. The right choice depends on the finish offered, the condition of your wall and the installation process you can manage confidently.
At a glance: Choose paste-the-wall if you are prepared to apply the specified adhesive and follow that material's working-time instructions. Choose peel-and-stick if you want to avoid separate paste and your wall meets the self-adhesive material's surface requirements. Both still require accurate measurements, a plumb starting line, numbered panel checks and careful seam alignment. Neither label guarantees easy fitting or damage-free removal.Start with the material actually being ordered
Start at the product's material selector, not at a styled photograph. This site offers Non-Woven, Vinyl, Heavy and Peel and Stick as material choices, but a name alone does not establish the installation method for every finish. The site's installation guidance describes paste-the-wall for non-woven murals and gradual backing removal for peel-and-stick. Confirm the method for the exact material selected, particularly Vinyl or Heavy, before buying adhesive or beginning work. The supplied instructions determine preparation, seam treatment and handling; if the listing and delivered directions disagree, ask the supplier first.
These are alternative methods, not consecutive steps. Paste is not an extra ingredient for the site's peel-and-stick finish, and a paste-the-wall panel has no liner to remove. Decide before ordering, because the finish determines which supplies you need on fitting day. If you are hiring an installer, show them the exact selected material rather than saying only that you have bought a mural.
What happens with paste-the-wall?
After the wall is clean, smooth, dry and ready under the material guidance, mark a vertical guide. Apply the specified adhesive evenly to the wall, over an area a little wider than the first panel as the site's installation guide describes. Bring the dry panel to that coated area, align it with the guide and smooth from the centre outwards. Match the next numbered panel at the edge before committing the whole strip. A small error at the first strip can shift the scene across the entire wall.
The schematic below deliberately shows the coated wall separately from the dry print. It does not prescribe an adhesive brand, coat thickness or number of minutes available for repositioning. Those details depend on the actual supplied system. If the instruction sheet calls for one-panel areas, do not cover the whole wall with paste in advance. Work within the recommended time and clean up only as directed for the print surface.
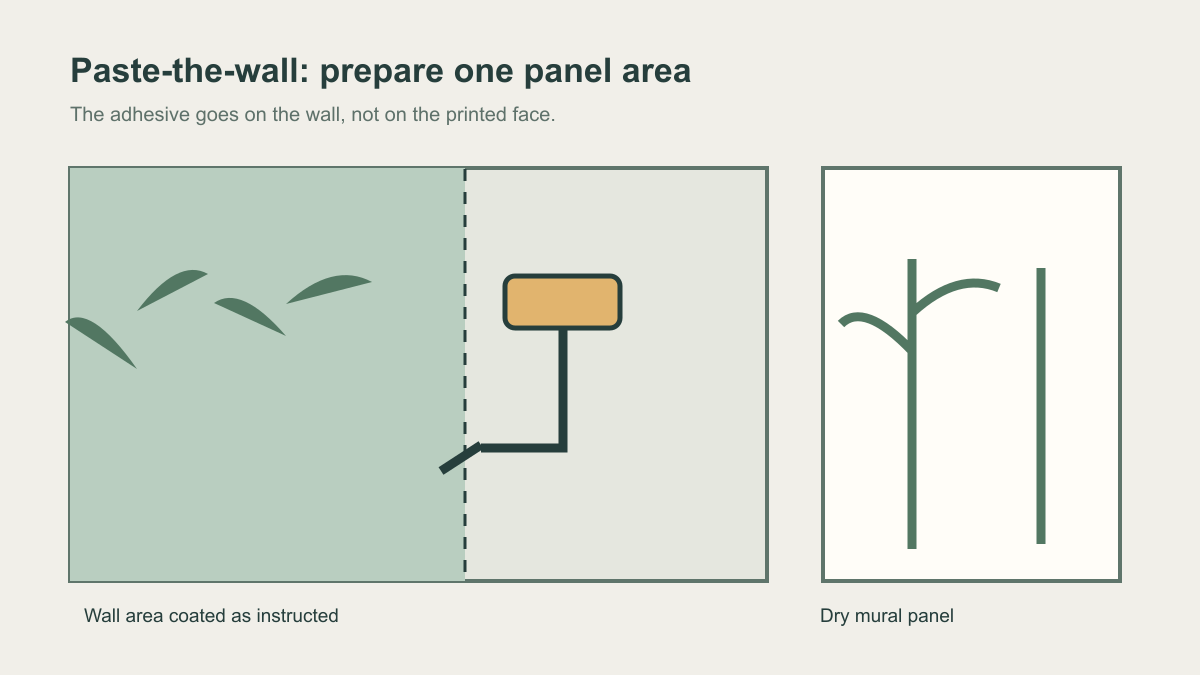
This method adds an adhesive tray or container, roller or brush, floor protection and cloths for permitted residue removal. The wet working area is a practical consideration in a furnished room. On the other hand, the printed panel is handled dry before it reaches the wall. Do not assume it can always be slid around freely once placed: adjustment time varies with the adhesive and material, and the package instructions are the authority.
What happens with peel and stick?
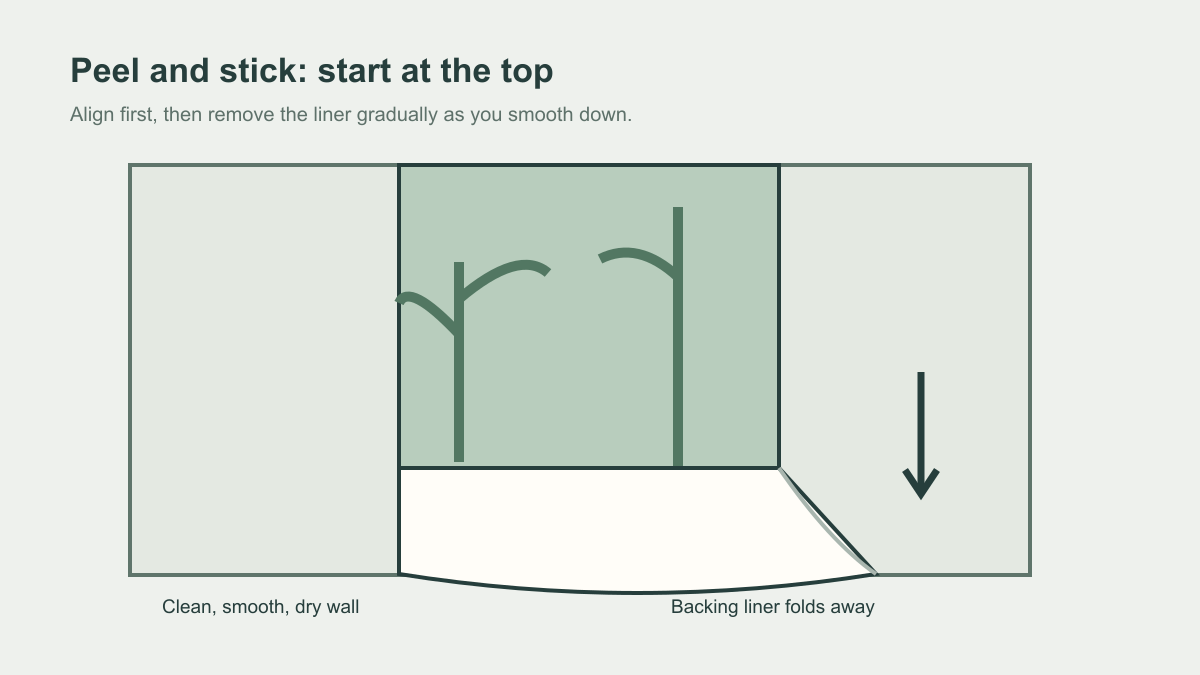
For the self-adhesive option, keep the backing on until the panel is at the wall. After checking the sequence and marking a plumb guide, expose a small section at the top, align it, then pull the liner away gradually while smoothing down. The drawing below makes the sequence visible: the backing folds away while most of the sheet remains supported. Removing it all at once creates a large sticky surface that can fold onto itself or make the top edge difficult to place precisely.
This is not a shortcut around wall preparation. The site guide calls for a clean, smooth, dry wall and fully cured paint. Dust, texture or a fresh coating may affect suitability under the material instructions. Test the supplied or ordered sample where the supplier recommends if you are uncertain. The drawing explains how the liner is handled; it does not prove the adhesive will perform on an untested surface.
How do the methods compare at the seams?
Both systems depend on a plumb first panel and the correct printed order. Check a recognisable branch, horizon or line across the next seam before smoothing the entire panel. Do not stretch the sheet to force a match. The site's general guide says to butt seams unless the instructions supplied with that material specify an overlap. That caveat matters: a seam method carried over from another wallpaper can spoil an otherwise careful installation.
Compare the actual tasks, not a promise of speed. Peel-and-stick avoids a separate wet adhesive but asks you to control a tacky panel while progressively releasing its liner. Paste-the-wall keeps the printed sheet dry during positioning but adds adhesive preparation and clean-up under that product's instructions. Both need a plumb first panel and accurate crop. Windows, irregular corners and a tall stairwell can dominate the labour whichever finish you choose; if safe access or panel handling is doubtful, discuss the job with an experienced fitter before ordering.
Set up the room for the method you selected
For paste-the-wall, protect the floor beneath the working area and put the specified adhesive, application tool and permitted clean-up supplies within reach. Prepare only the amount and area directed by that material's instructions. You need space to carry each dry panel to the pasted section without dragging its printed face across tools or furniture. Check where the wet edge will stop before you coat the wall; a doorway or socket can interrupt the next working section.
For peel-and-stick, keep the release liner on while you lay out the numbered panels. Clear a clean area where the uninstalled length can be supported without folding its exposed adhesive onto itself. Position a helper to hold the loose panel while you establish the top edge and pull the liner away gradually. A paste tray is unnecessary, but controlled handling space is not. In either case, inspect the prepared wall and the complete dry image before starting; an adhesive method cannot rescue a missing panel or a wrong crop.
Which method fits the wall and the people installing it?
Choose from the condition of the actual surface and the handling demands of the job, not from the assumption that one method is always simpler. A self-adhesive print needs a wall that meets its specified paint, smoothness and cure requirements; a pasted print needs a wall and adhesive prepared to that system's directions. Neither should cover loose paint or dampness. If the wall is questionable, resolve the surface problem before choosing either finish. A permitted small test can reduce uncertainty, but it cannot certify the entire wall.
Then consider the working space. Paste-the-wall adds a wet adhesive station and clean-up, while peel-and-stick replaces that task with control of an exposed tacky sheet and its liner. A tall panel in a stairwell may need another person and safe access whichever method you choose. Ask an installer familiar with the exact material if you cannot confidently support the panel, reach the upper edge or align a seam. The label alone does not predict the labour.
Make the purchase decision before planning the fitting day
Ask for the installation and care sheets for the two exact finishes under consideration. Compare the required wall preparation, adhesive or liner handling, permitted repositioning, seam method and cleaning guidance. Confirm which material is actually offered for the chosen artwork and request physical samples if colour, surface feel or print detail matters. A styled image cannot distinguish these properties. The separate material-choice guide covers the broader trade-offs; the supplier's current instructions settle the method for this order.
When the wall and material are confirmed, measure and approve the crop, check the numbered panels and arrange the tools and access appropriate to that finish. Keep the two installation methods separate rather than borrowing paste, seam or removal advice from one for the other. If the instructions are missing or contradictory, pause the order and ask the supplier to clarify them. The better option is the one you can install on this wall under its documented conditions, not the one with the shorter name or the more effortless-looking photograph.